How to Build a WhatsApp Chatbot with AI
💡 Want the big picture first? See what an AI WhatsApp chatbot can do for customer support on the WhatsApp Chatbot overview.
Overview
This guide provides comprehensive instructions for configuring WhatsApp bots using the Meta WhatsApp Cloud API and integrating them with the Mingleego platform. By following these steps, you will establish a bot capable of automating messaging, responding to customer inquiries, and enhancing engagement on WhatsApp. The process involves setting up a Meta Business account, creating a Meta Developer App, configuring API access, and integrating the bot with Mingleego.
Prerequisites
Before configuring a WhatsApp bot, ensure the following requirements are met:
- Meta Business Account: A Meta Business Account (also known as a Meta Business Portfolio) is required to access Meta's developer tools and APIs. If you don't have one yet, follow the instructions in the Creating a Meta Business Account section to set it up.
- Meta Developer App: A Meta Developer App is required to manage API connections, including webhooks and access tokens. Follow the instructions in the Creating a Meta Developer App guide to set up your app.
- Phone Number: An active phone number capable of receiving SMS. The phone number does not need to be registered on WhatsApp or the WhatsApp Business App.
Meta Developer App
A Meta Developer App is required to access the WhatsApp Cloud API and enable bot functionality.
If you have not yet created a Meta Developer App, follow the detailed instructions in the Creating a Meta Developer App guide to set up your app. Once created, return to this guide to proceed.
If you already have a Meta Developer App set up in the App Dashboard, proceed with the following steps to configure it for WhatsApp:
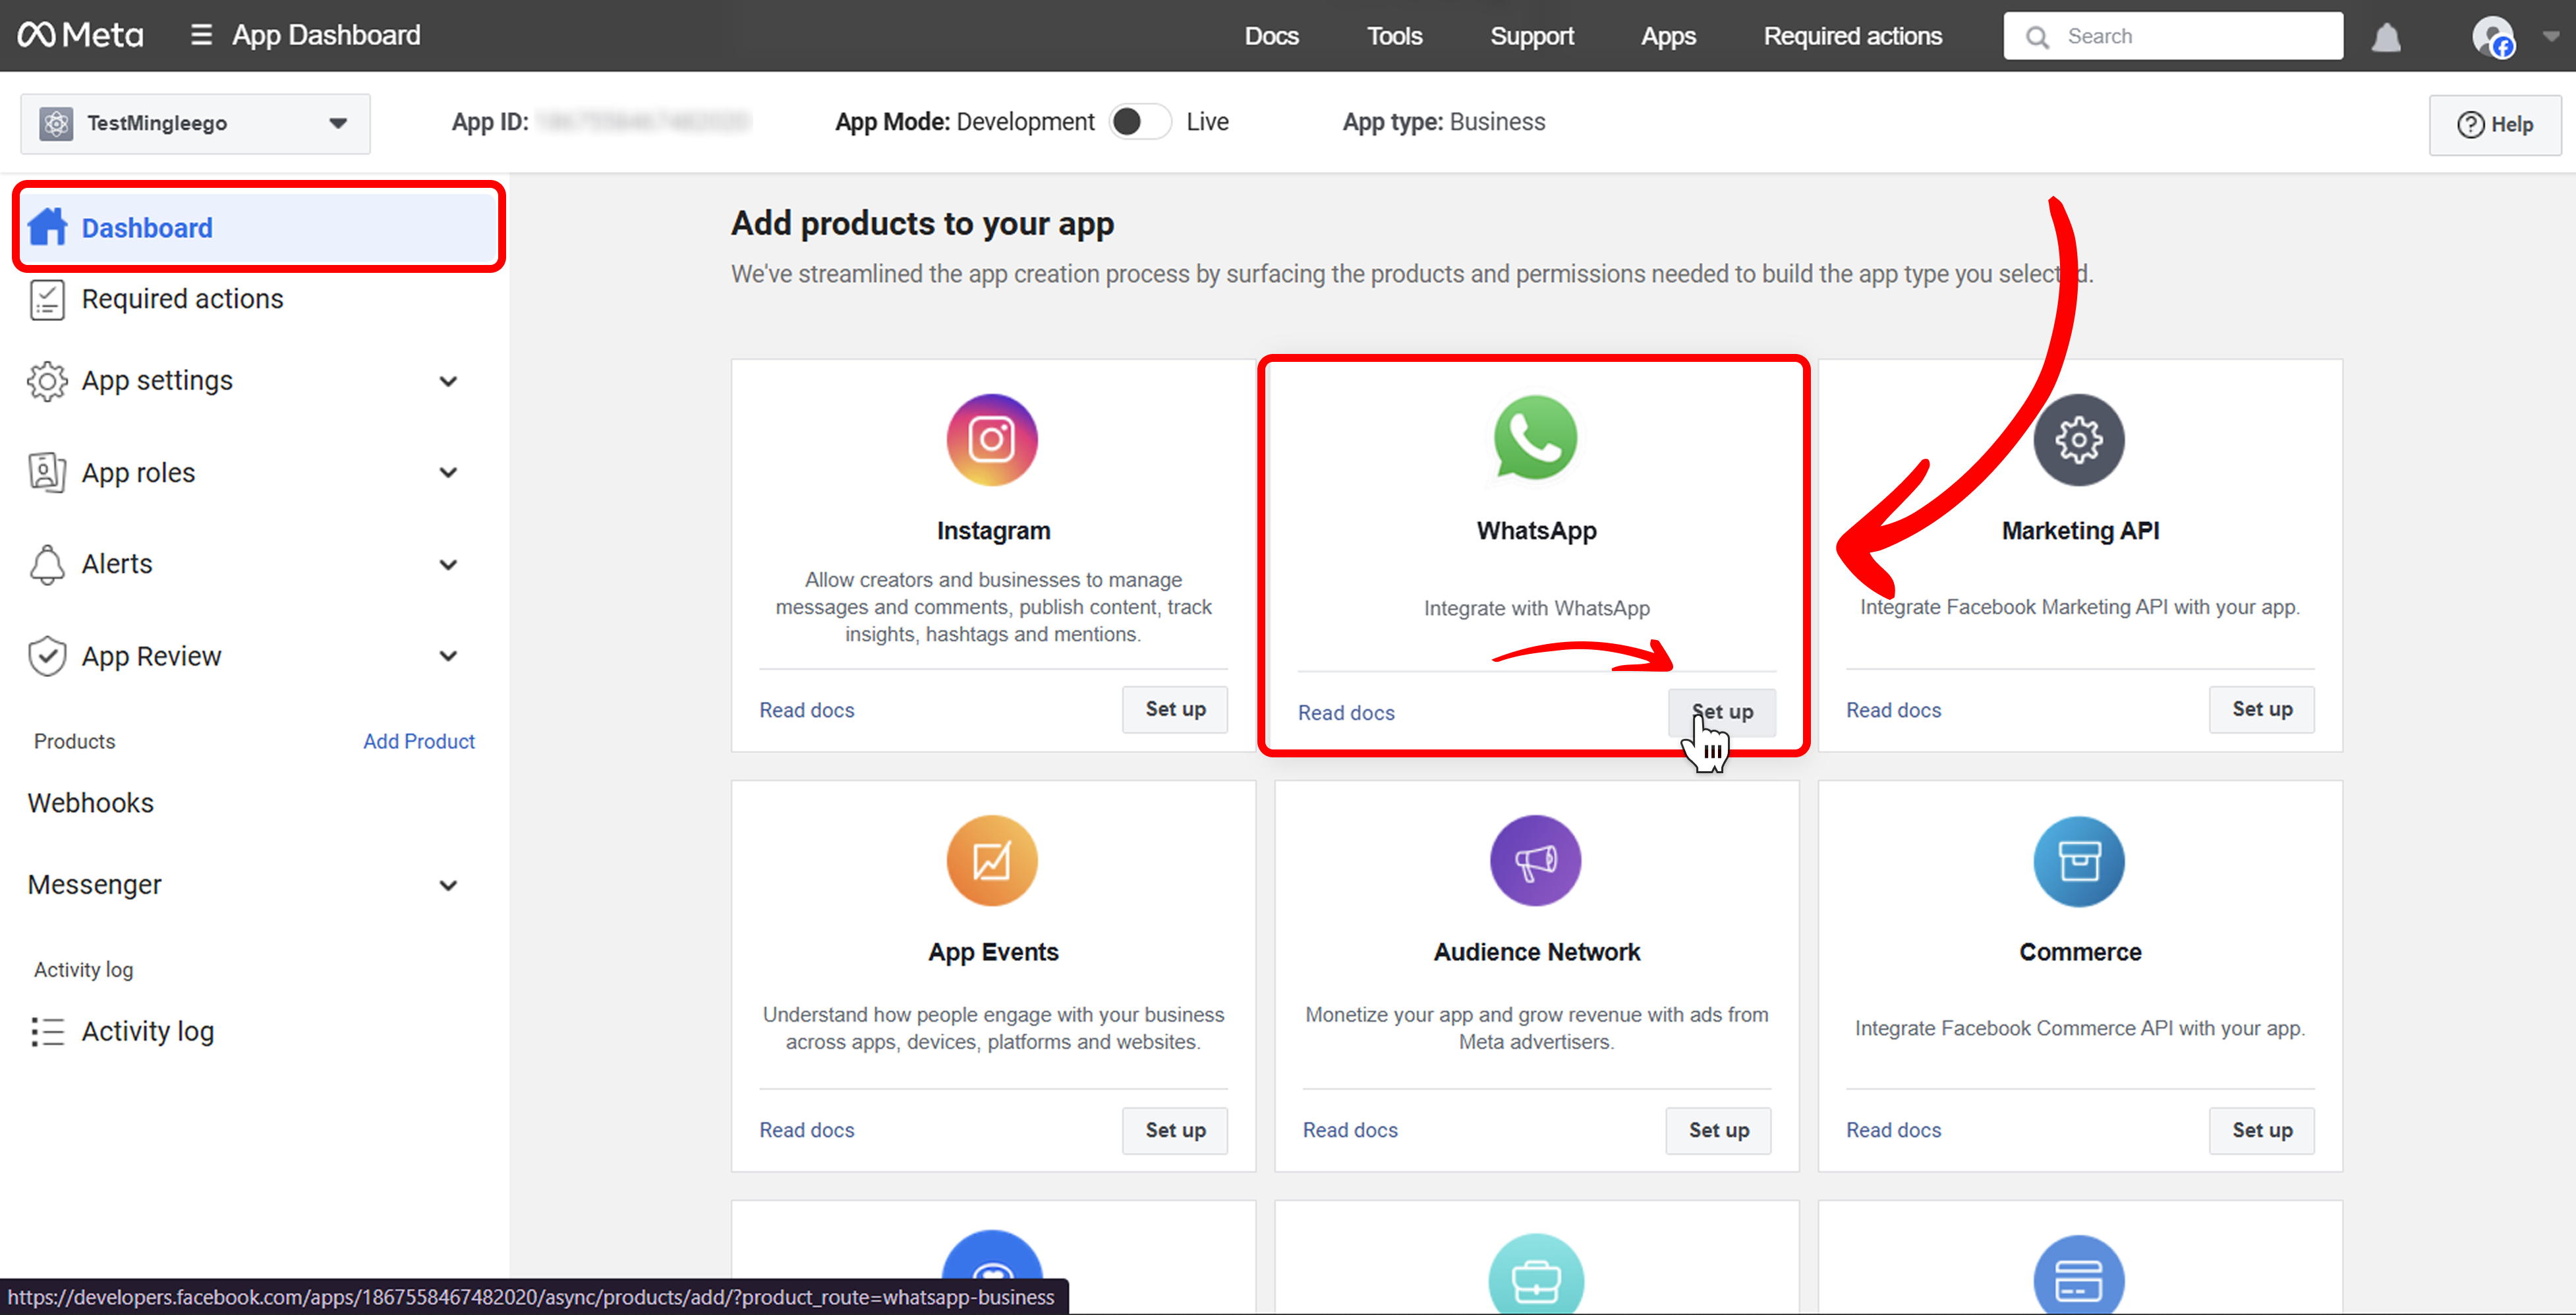
- Add WhatsApp Product:
- In the Meta Developer App Dashboard, select your app. Then, choose WhatsApp from the product list and click Set Up to enable WhatsApp integration.
- In the Meta Developer App Dashboard, select your app. Then, choose WhatsApp from the product list and click Set Up to enable WhatsApp integration.
After adding the WhatsApp product, your app is ready for further configuration. Proceed to the Obtain Phone Number ID section to continue setting up your bot.
Obtain Phone Number ID
To send and receive WhatsApp messages, you need to obtain a Phone Number ID from your Meta Developer App.
-
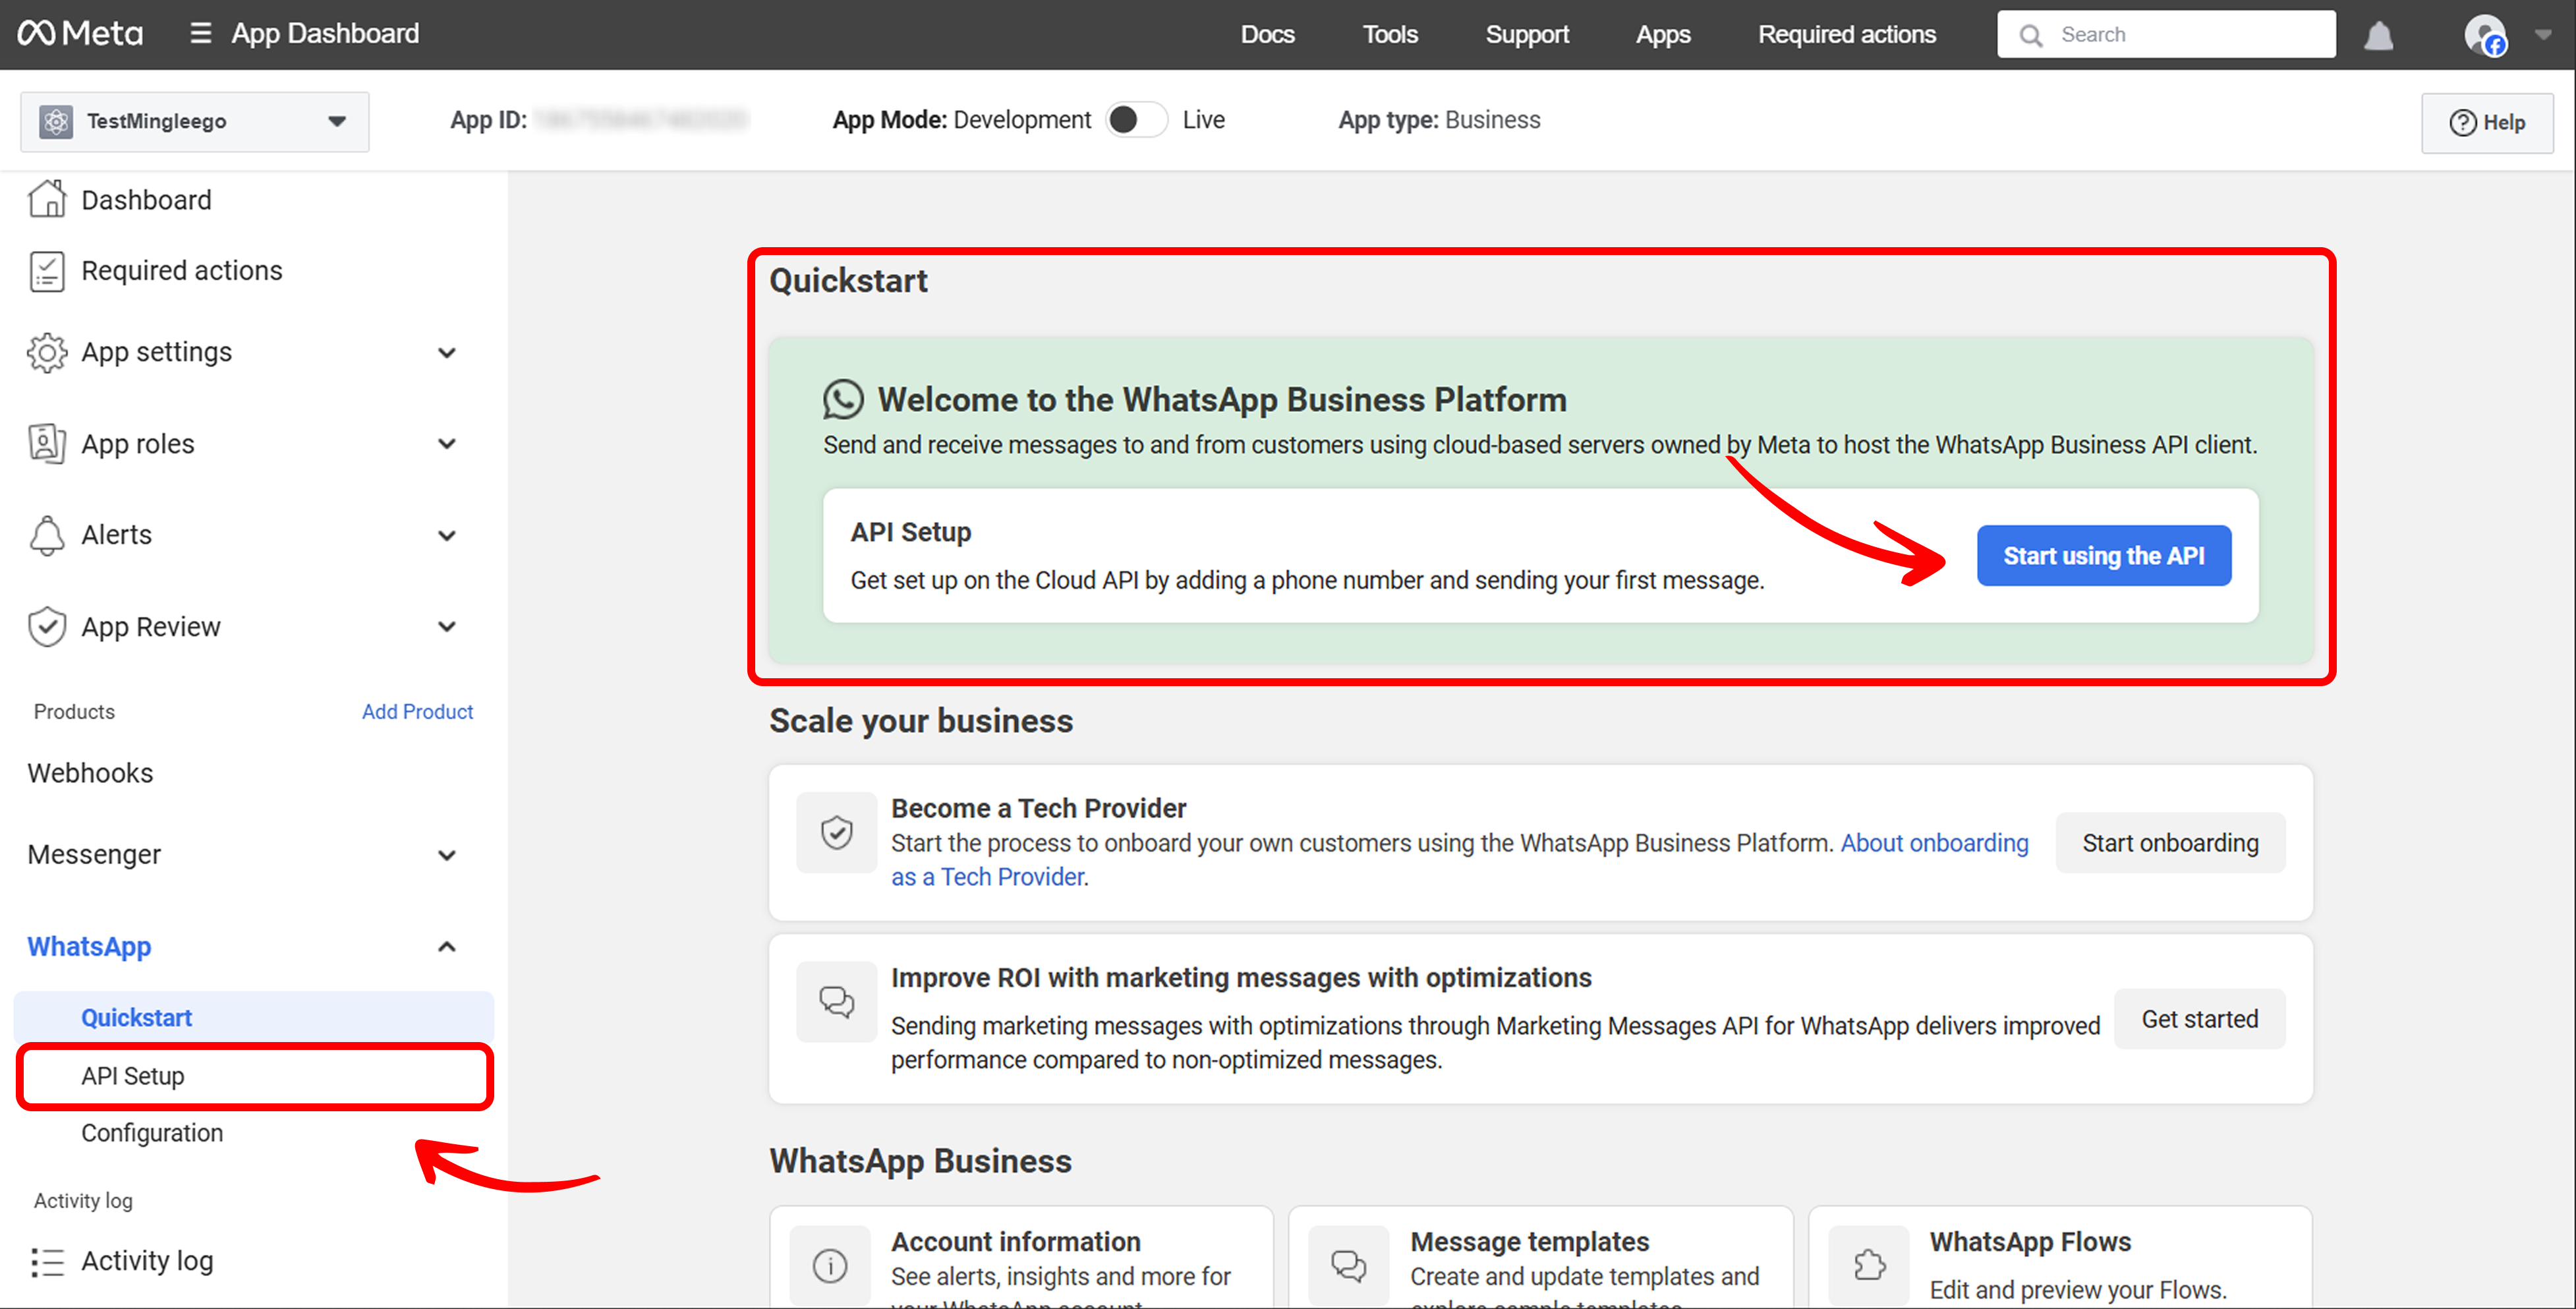
Access WhatsApp API Setup:
- In your Meta Developer App dashboard, navigate to WhatsApp in the left menu, then click API Setup.
- In your Meta Developer App dashboard, navigate to WhatsApp in the left menu, then click API Setup.
-
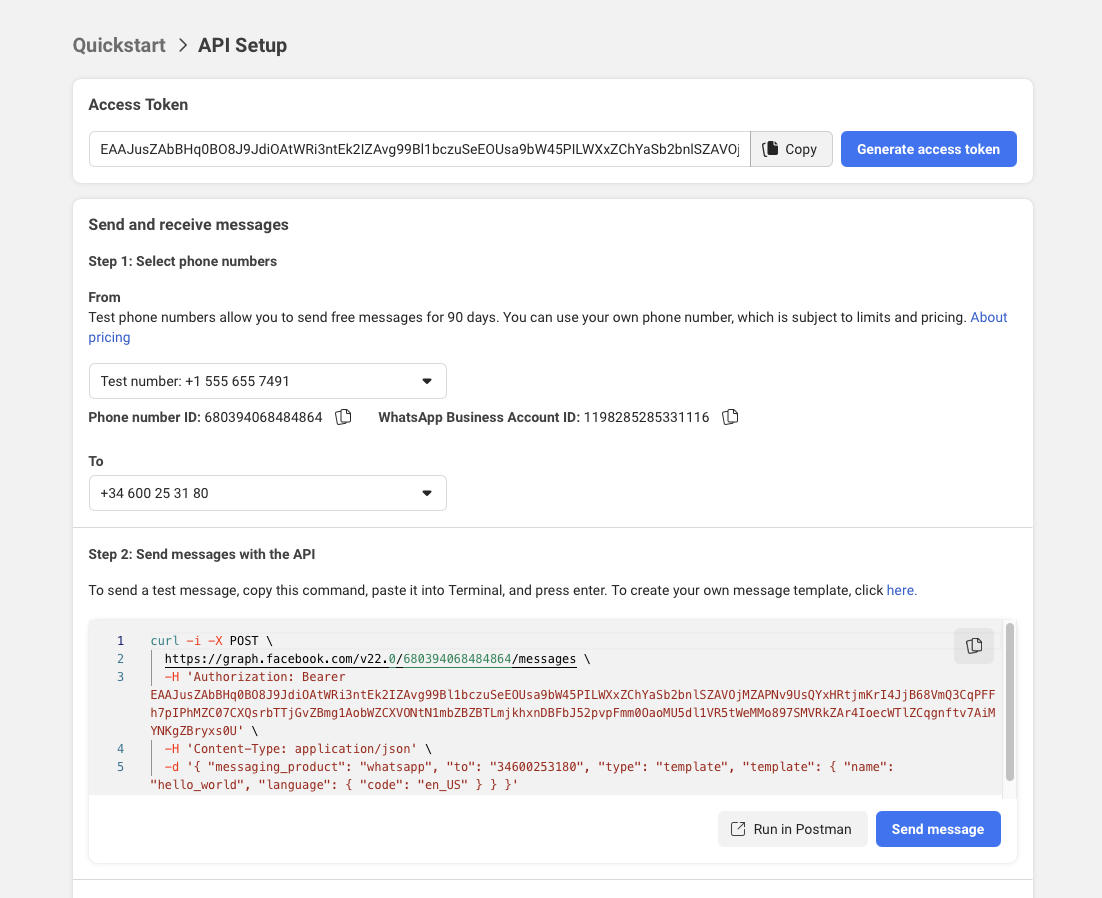
Select a Phone Number:
- In the API Setup section, you need to select a phone number to which you would like to send your first test message.
- For testing, you can choose a Test number - copy it, or if you have other options, copy and save it temporarily somewhere.
- Click Generate token to create a temporary token for testing. Important: Save this token because you will need it later. Keep in mind this is only for TEST purposes.
- Click Send message to test sending a message. This step allows you to make some kind of registration.
-
Copy Phone Number ID:
- After testing the message sending, copy the Phone Number ID displayed in the API Setup section and save it temporarily.
- This Phone Number ID will be used when creating your bot on the Mingleego platform.
Note: The temporary token is for testing purposes only. For a production scenario, you will need to generate a permanent token (see the Generate Permanent Token section).
Setting Up Webhook
Webhooks allow your bot to receive real-time updates from WhatsApp, such as incoming messages. Configure a webhook as follows:
-
Access Webhook Settings:
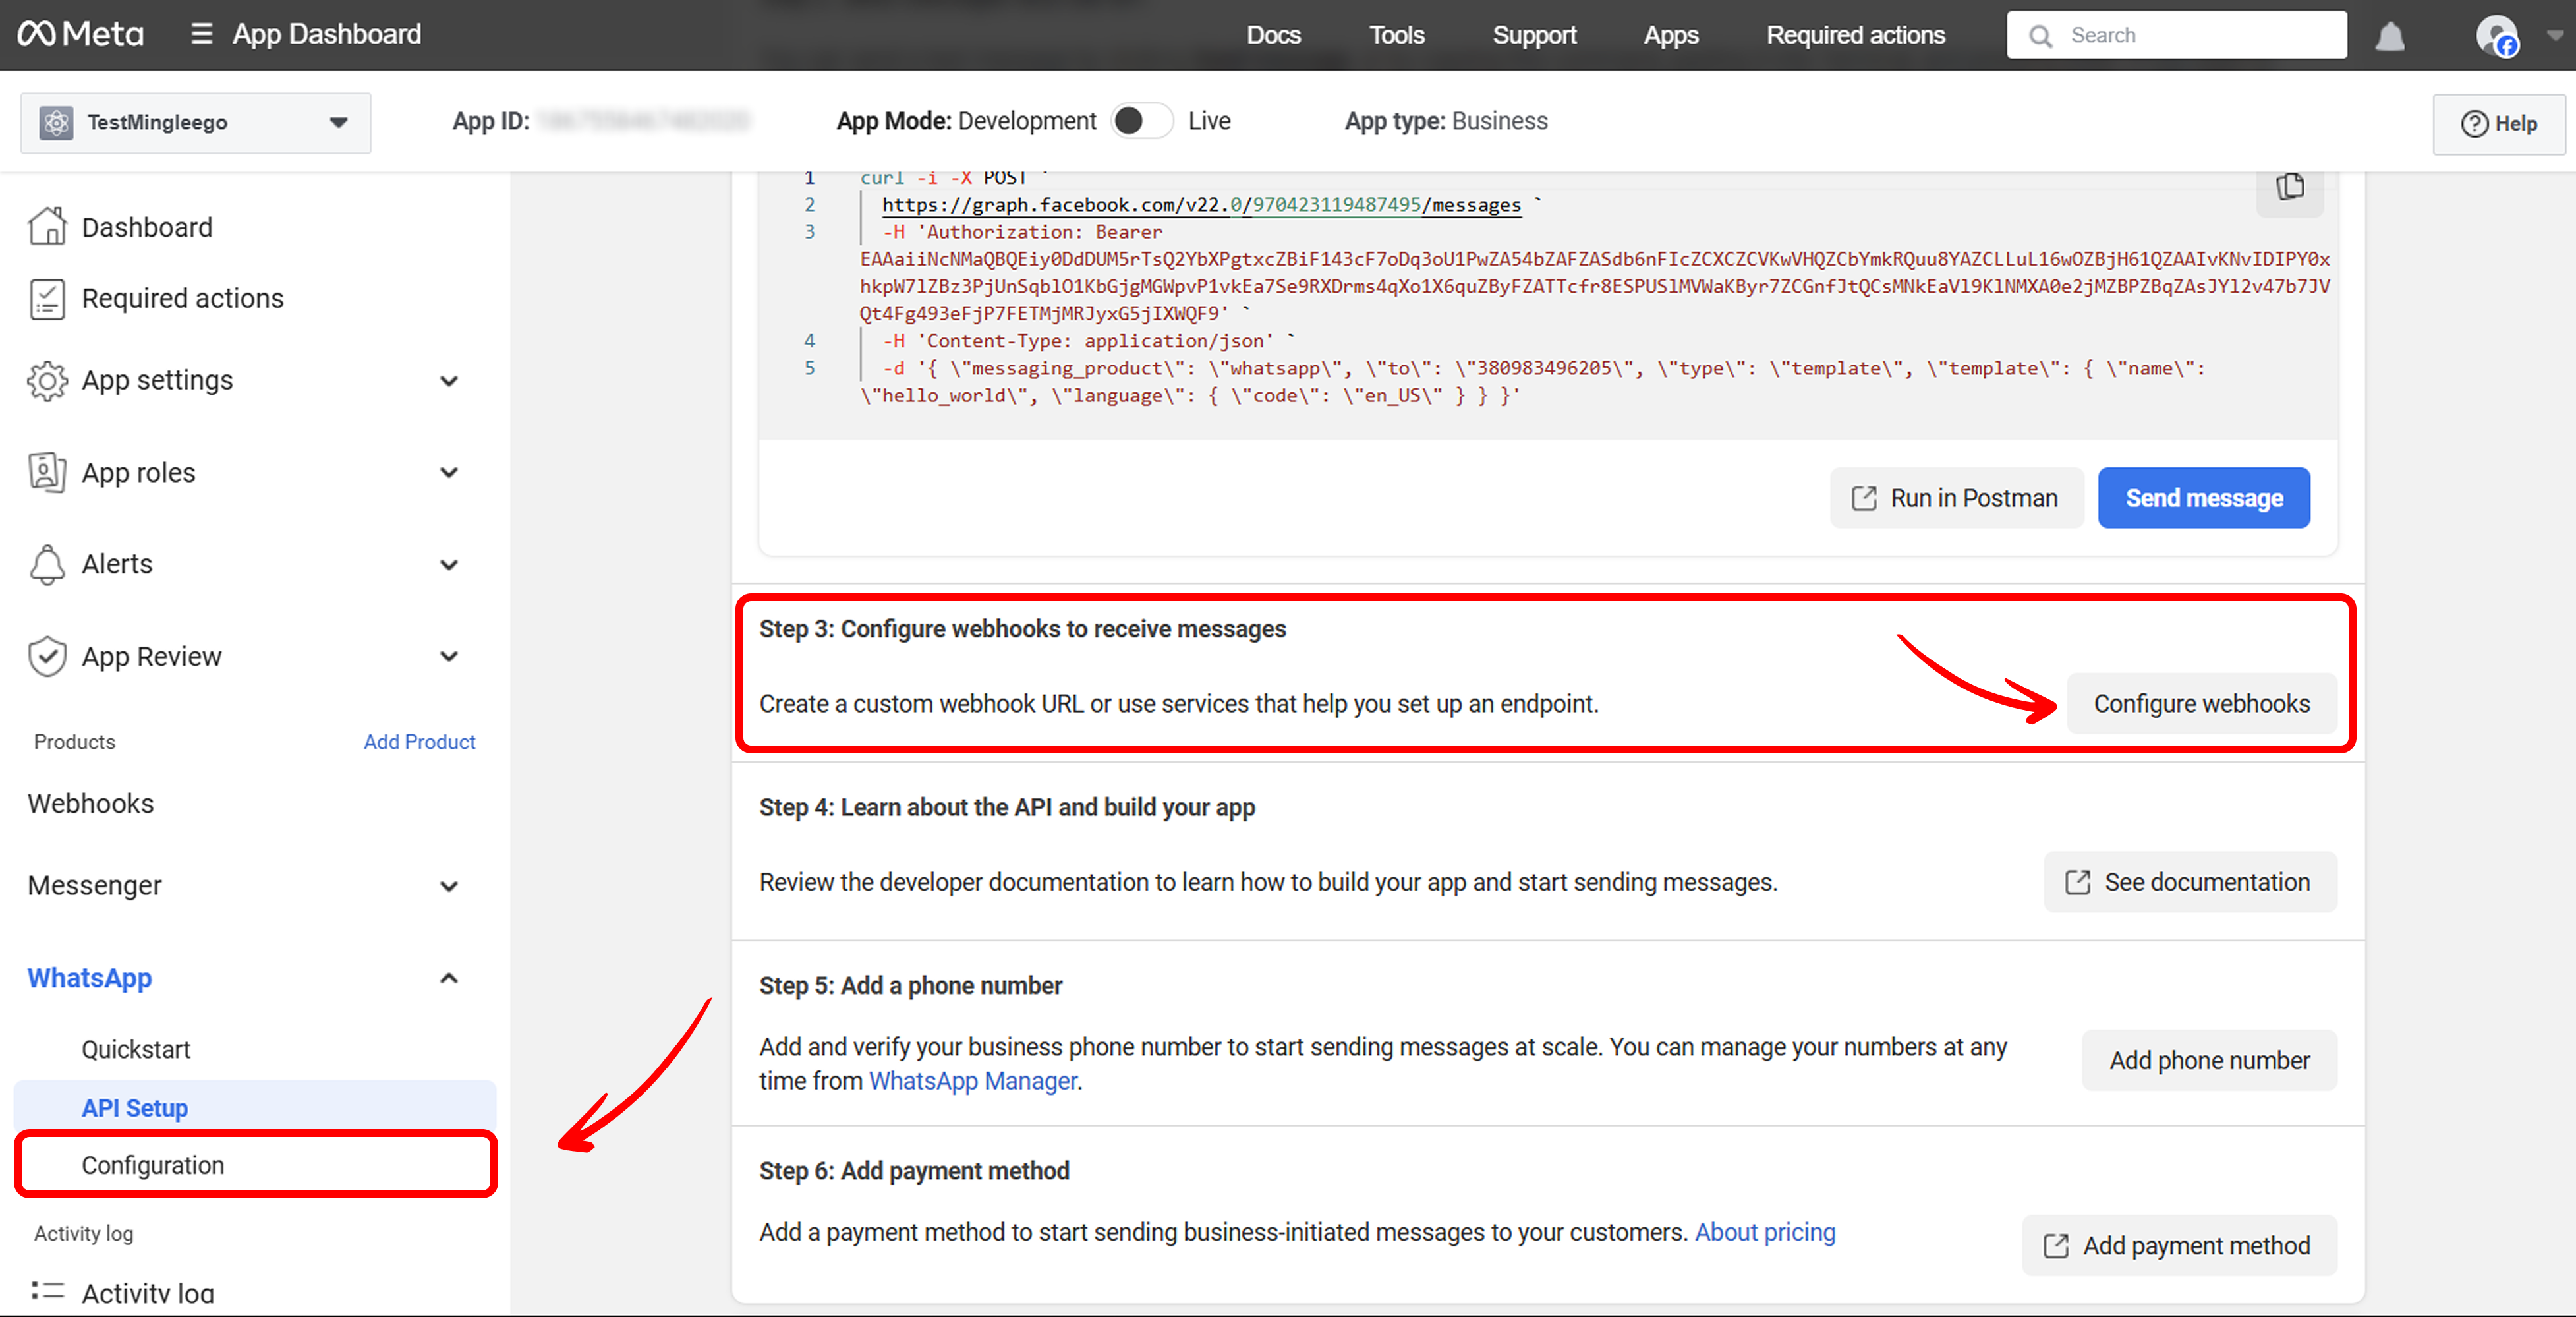
-
In your Meta Developer App dashboard, navigate to WhatsApp in the left menu, then go to Step 3 and click Configure webhooks. Alternatively, click Configuration in the left menu under WhatsApp.
-
In a separate tab, open the Mingleego platform and start creating the bot's social, as detailed in the Integrating with Mingleego section.
-
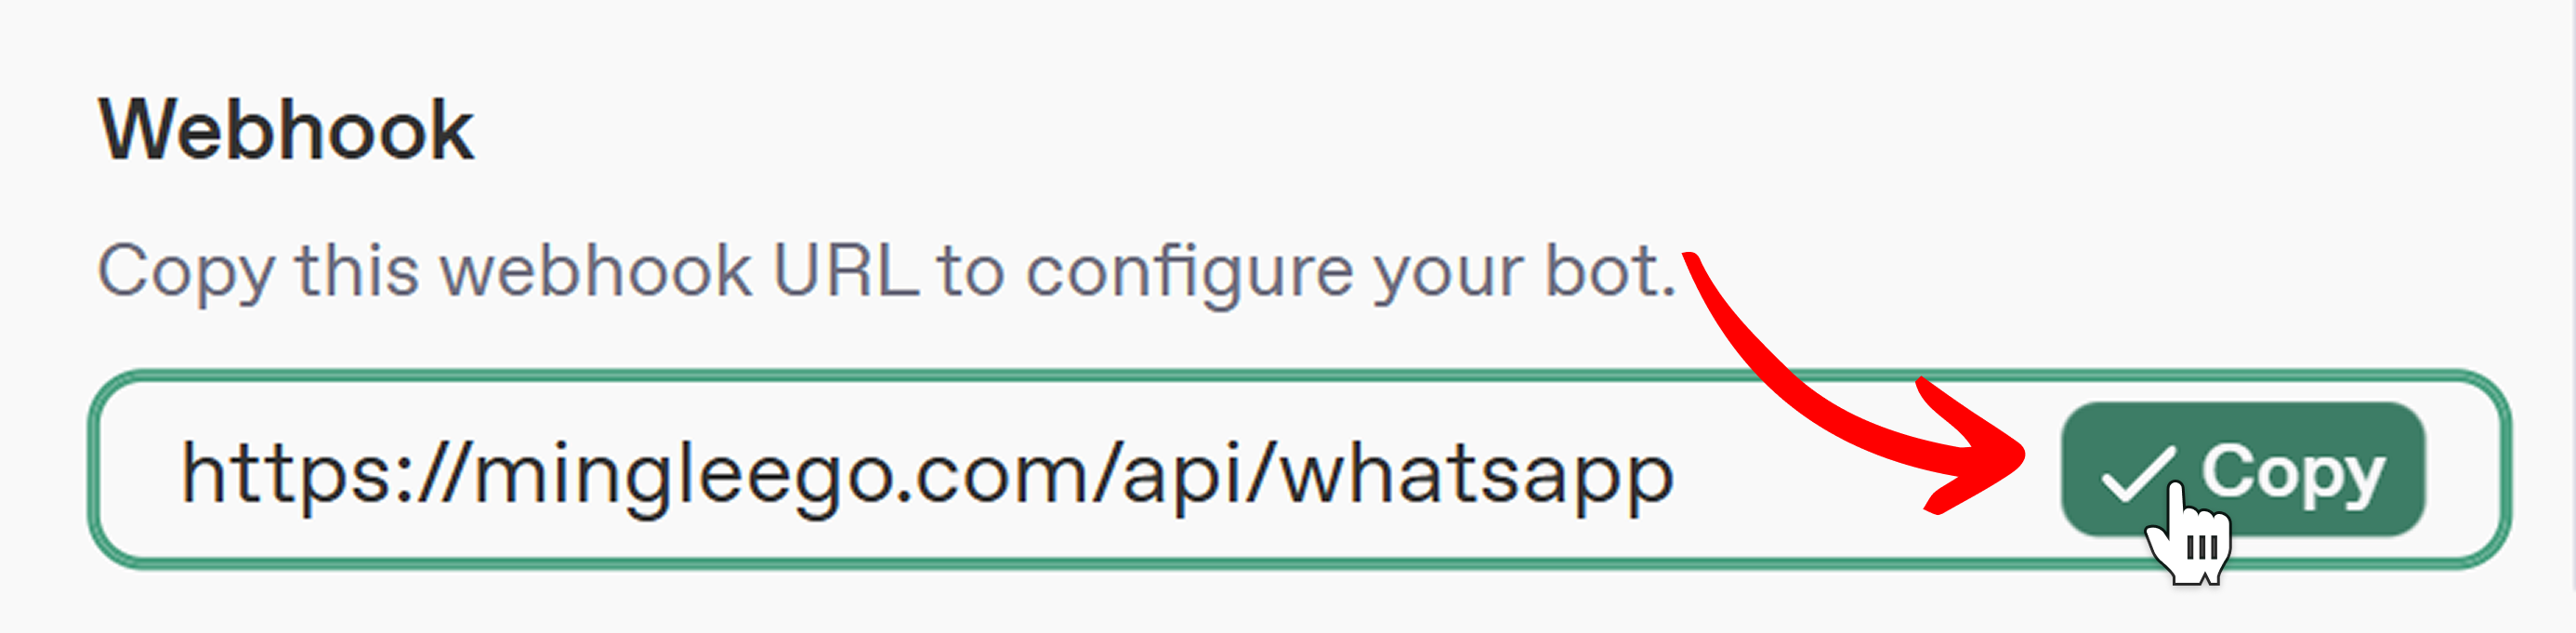
Copy the Webhook URL provided in the form.
-
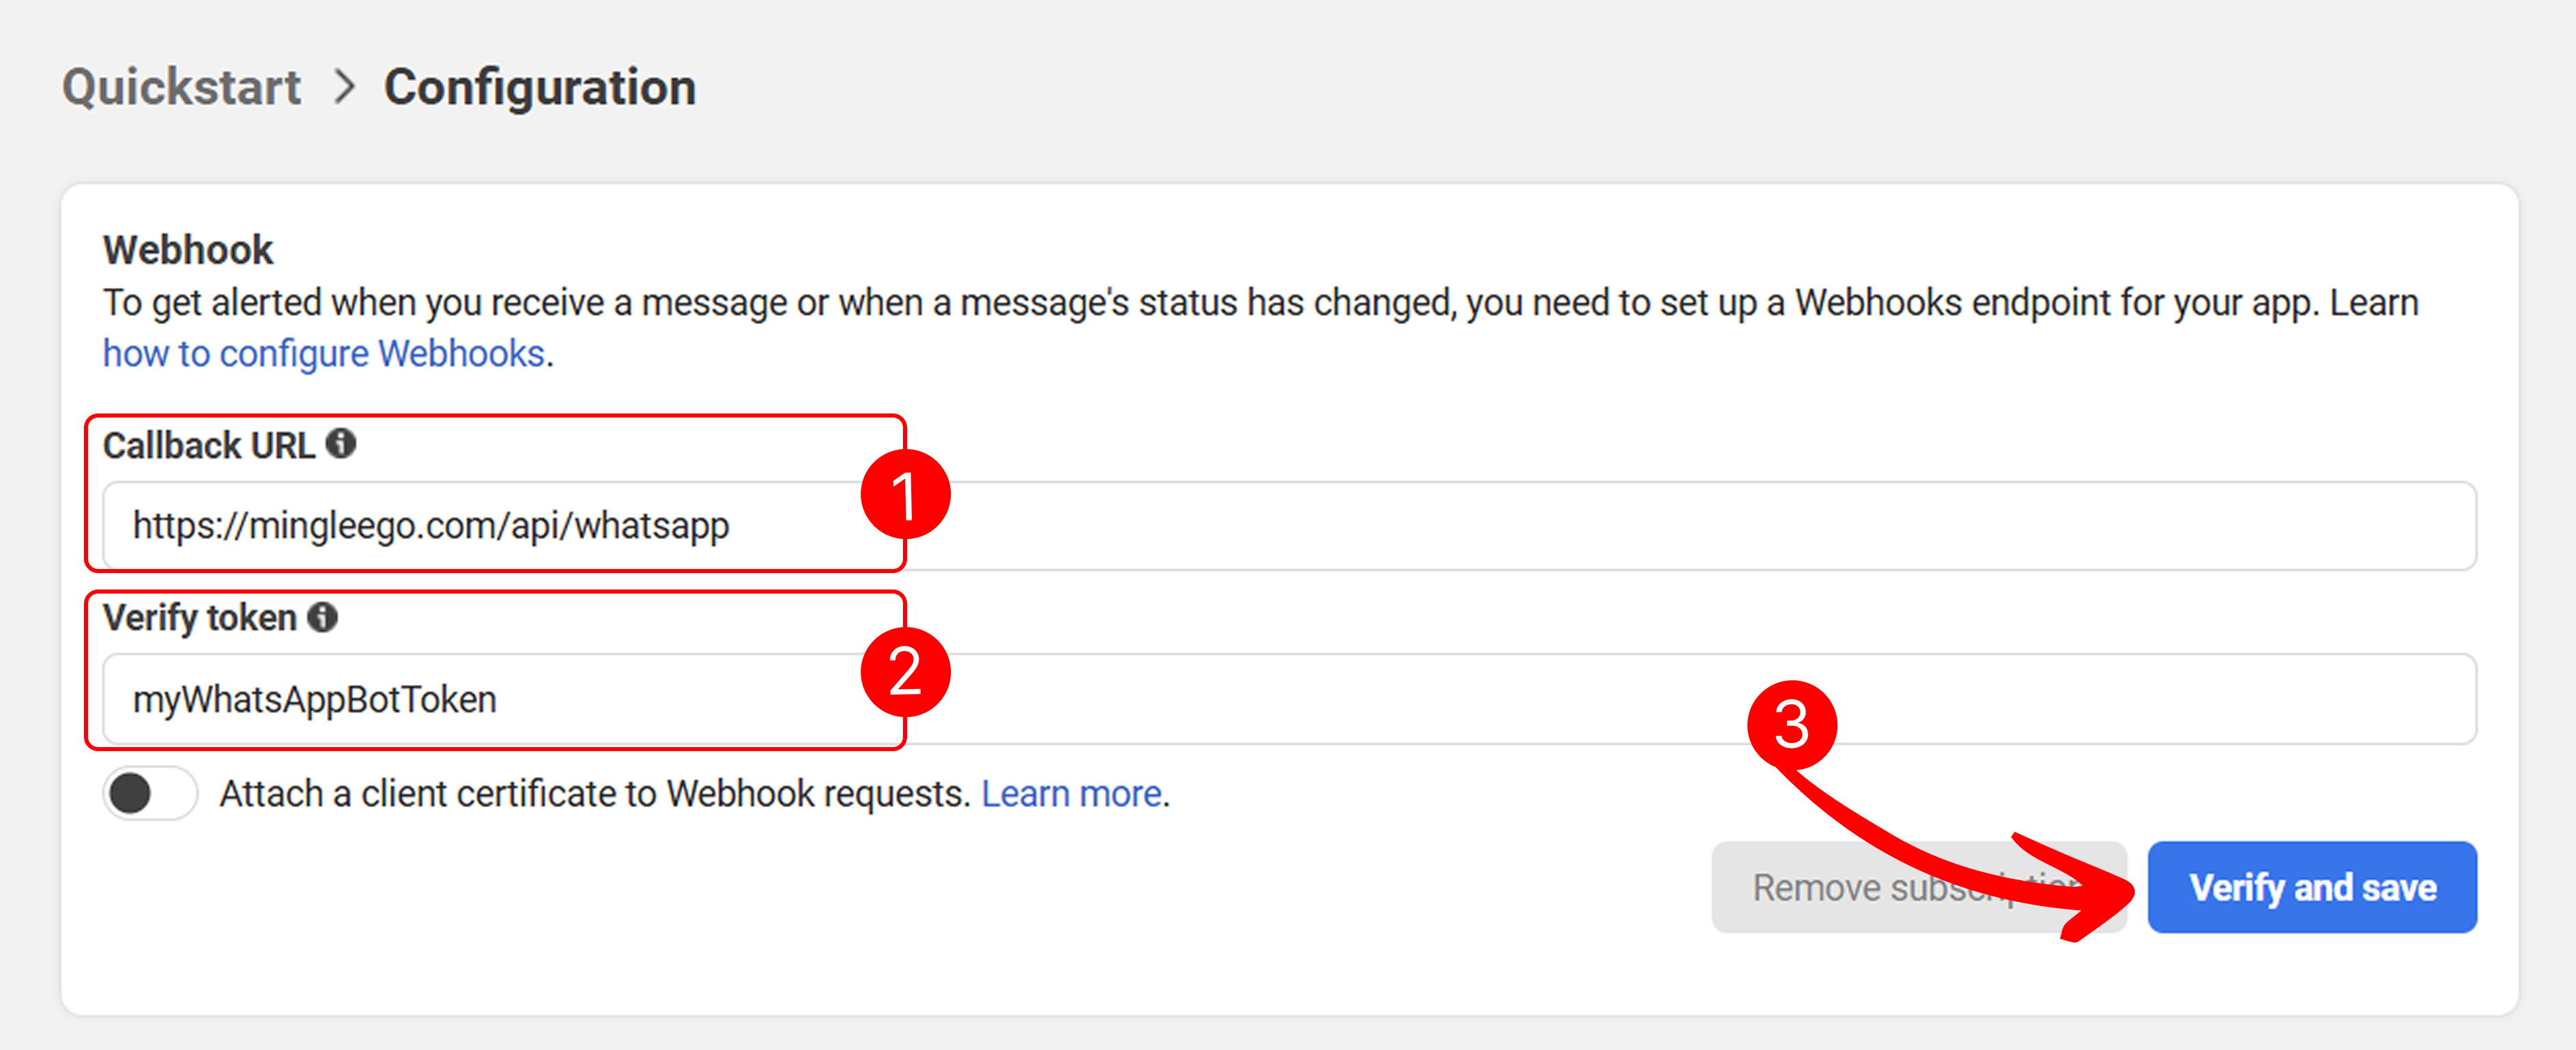
Return to your Meta Developer App dashboard, paste the copied Webhook URL into the Callback URL field.
-
Enter any Verify token you wish (e.g., a random string like "myWhatsAppBotToken"). Save the Verify Token securely for future reference.
-
-
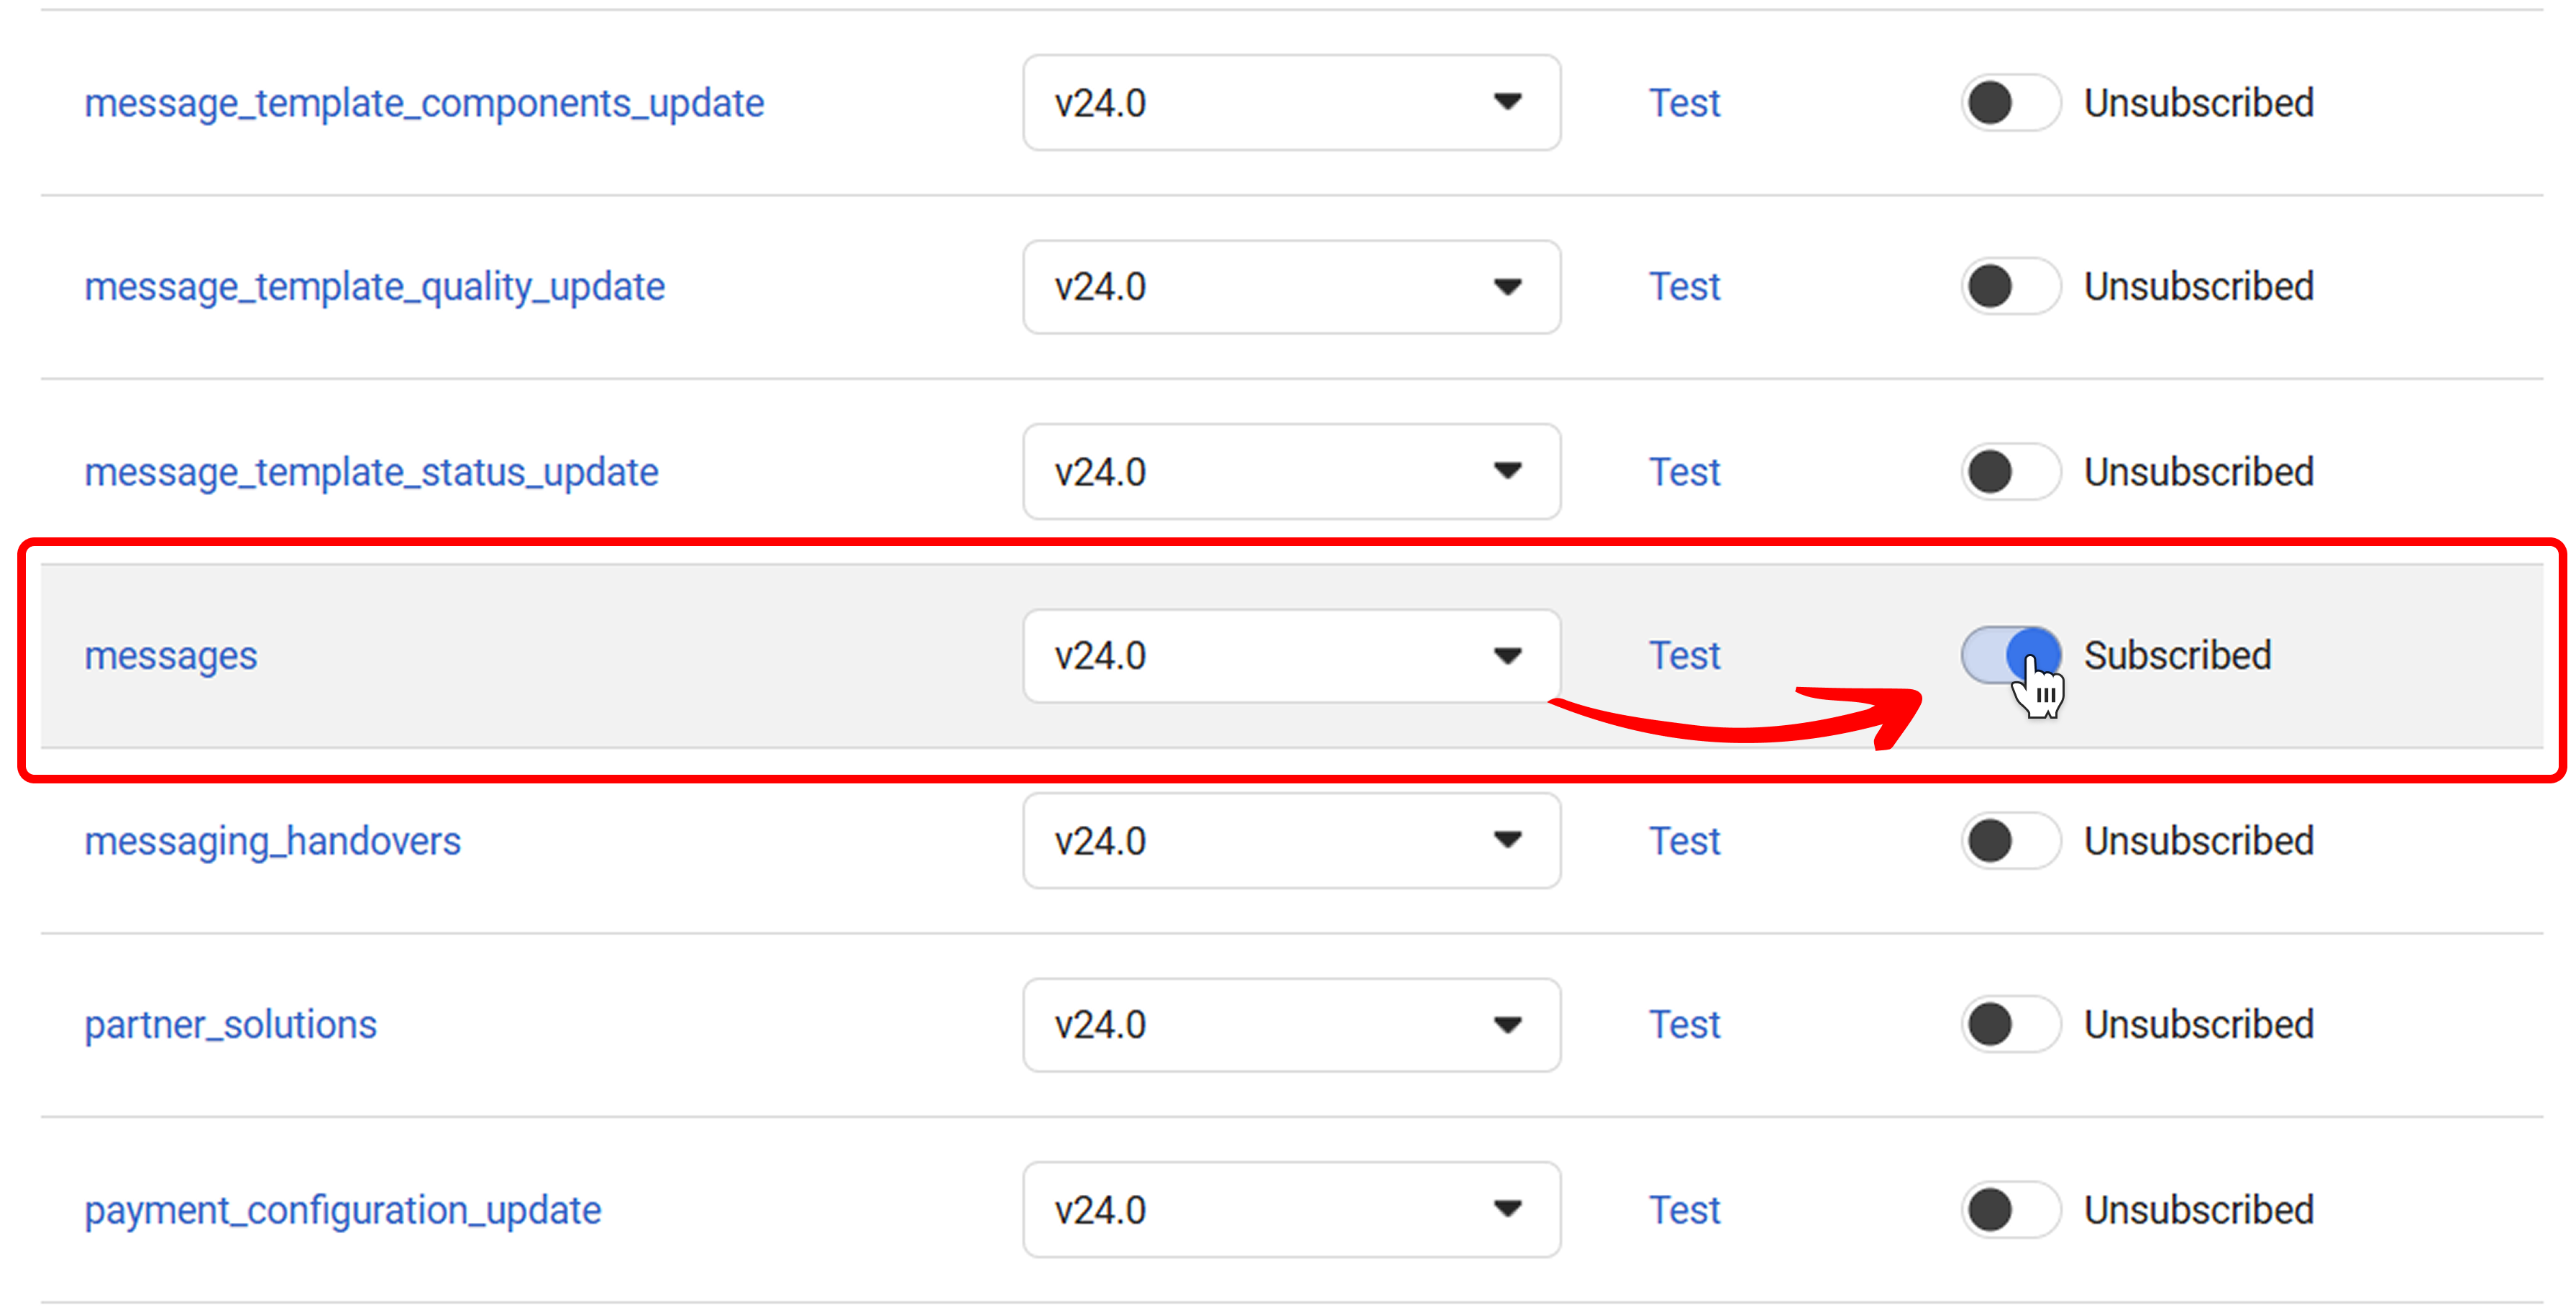
Configure Webhook Fields:
- After verifying the webhook, you need to configure the webhook fields to receive message updates.
- In the Webhook fields section, make sure to select messages to receive incoming messages and message status updates.
Generate Permanent Token
For a production-ready bot, you need a permanent token that does not expire every 60 days. The temporary token generated in the API Setup is only for testing purposes.
-
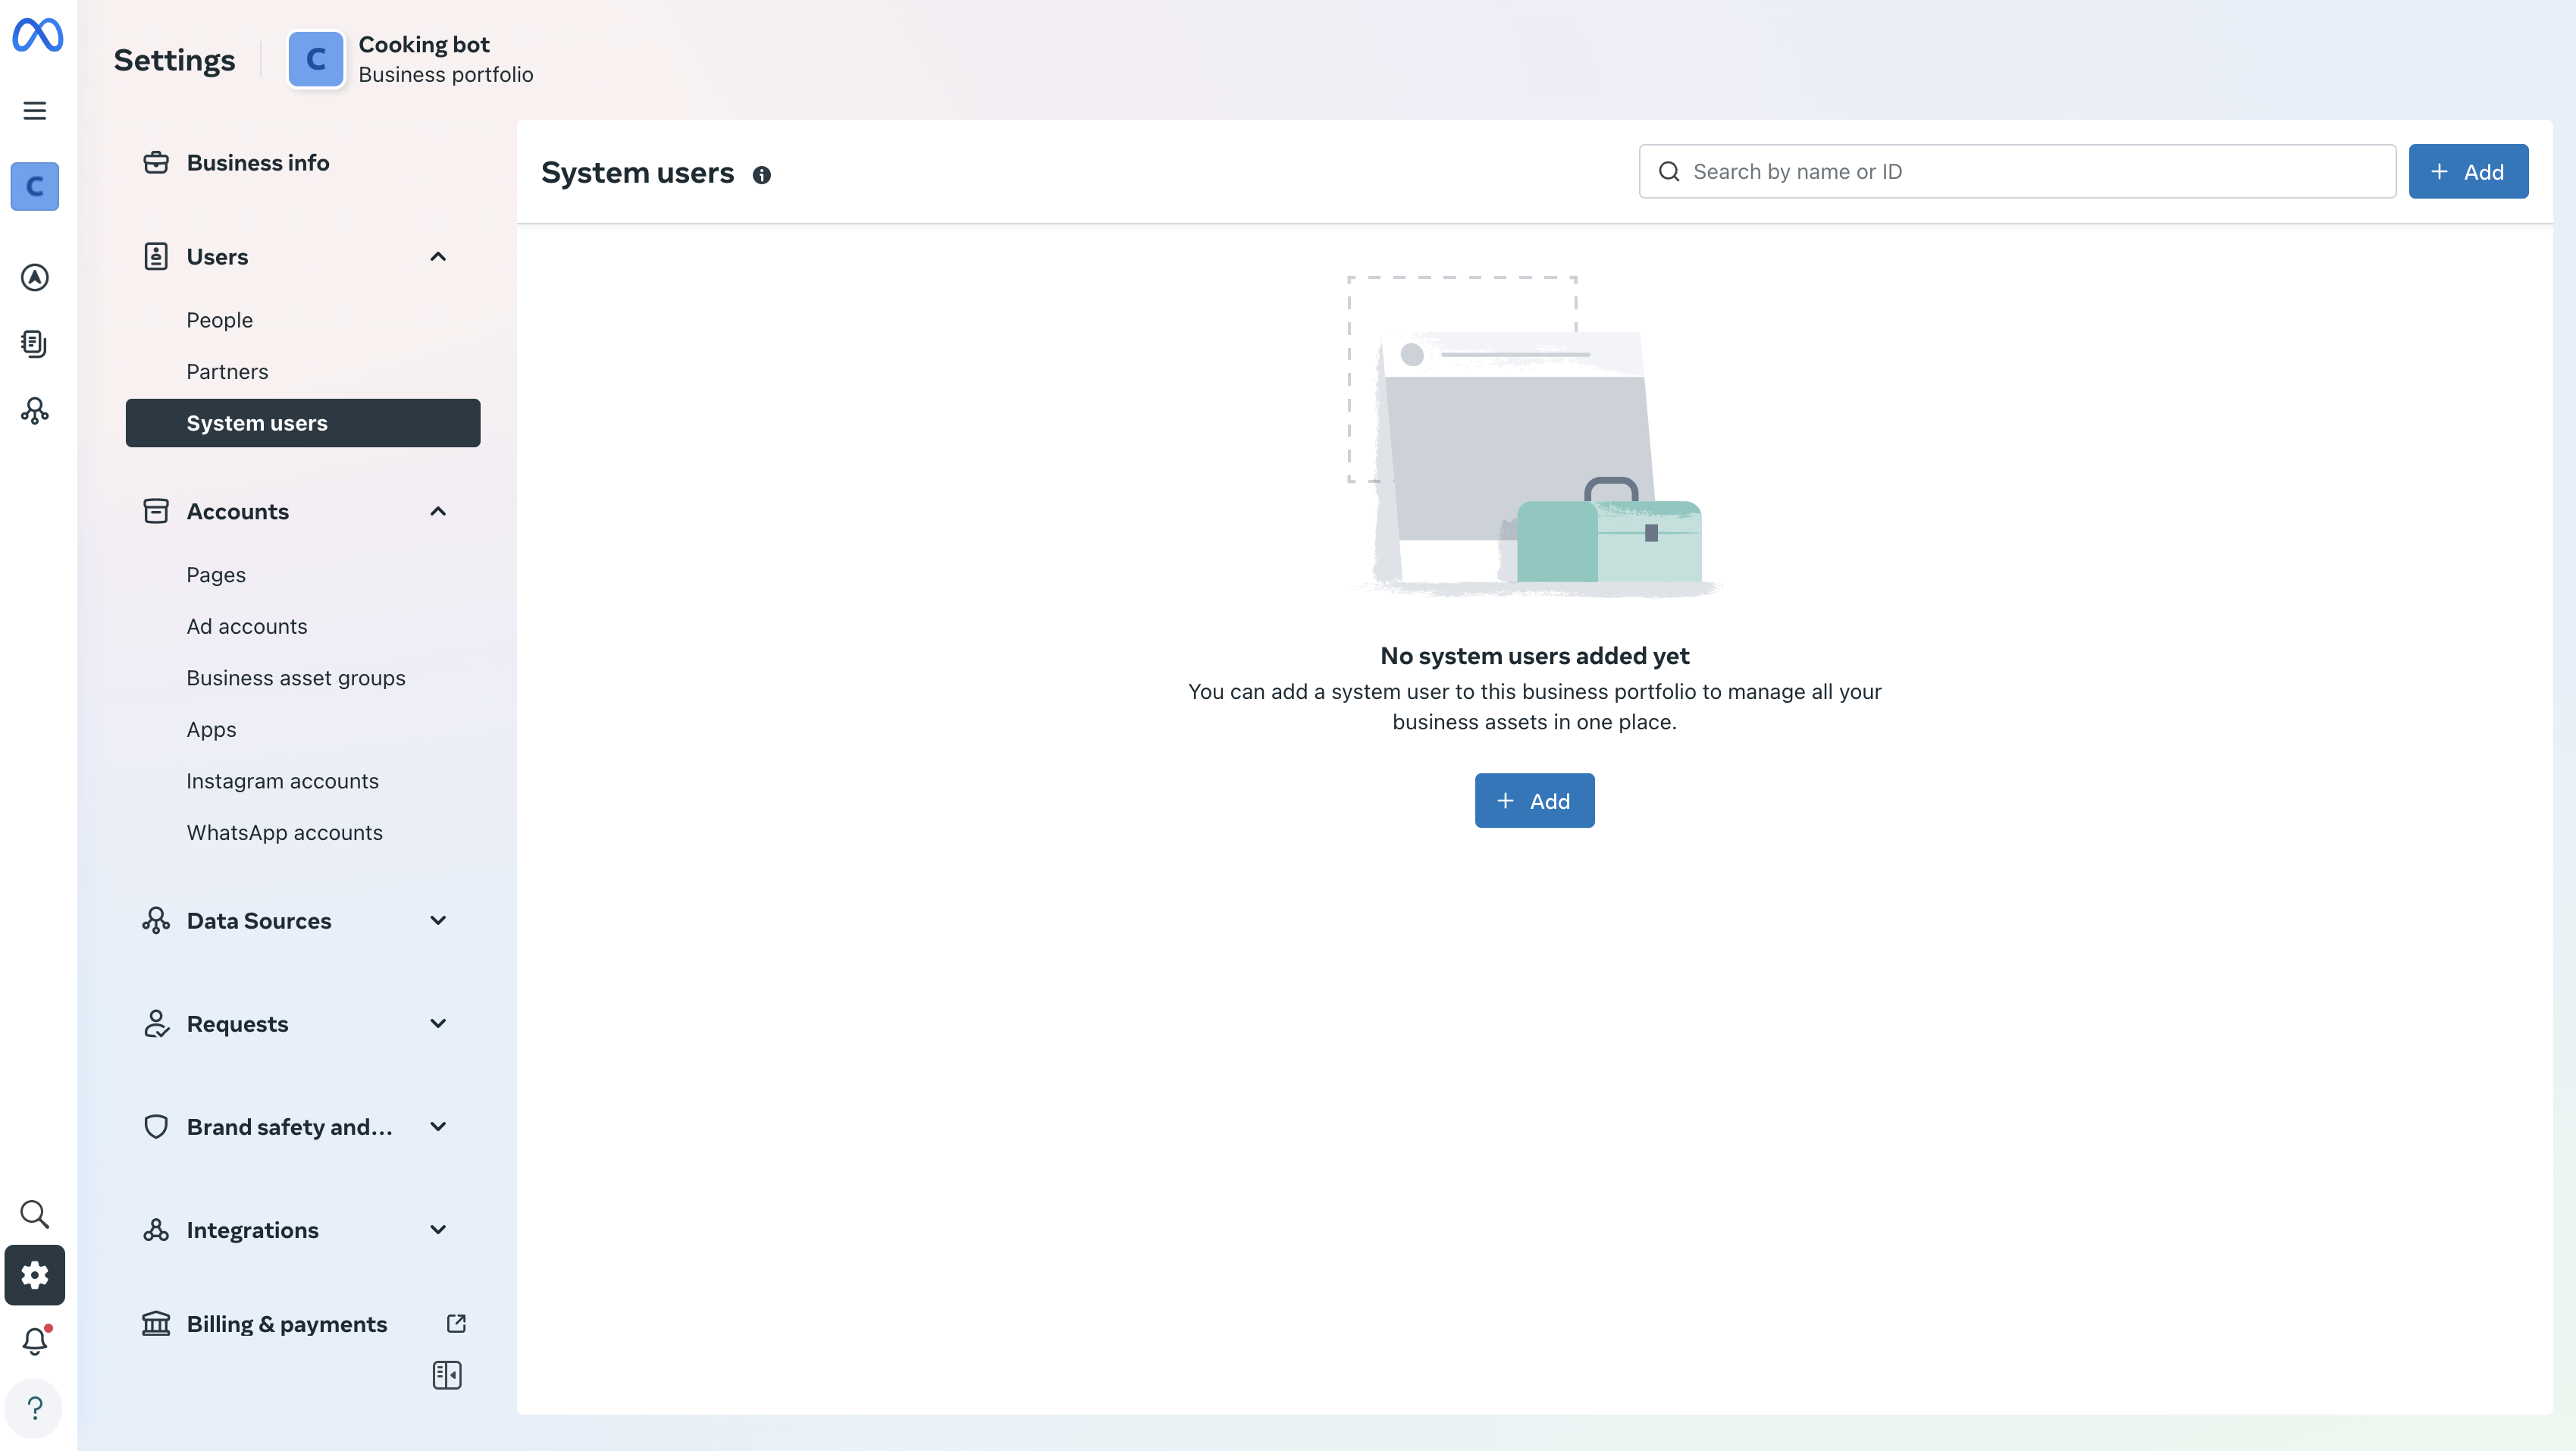
Access Business Settings:
- Go to Business Settings.
- Under Users, select System users. If you have already more than one Business portfolios, make sure that you opened the right one.
-
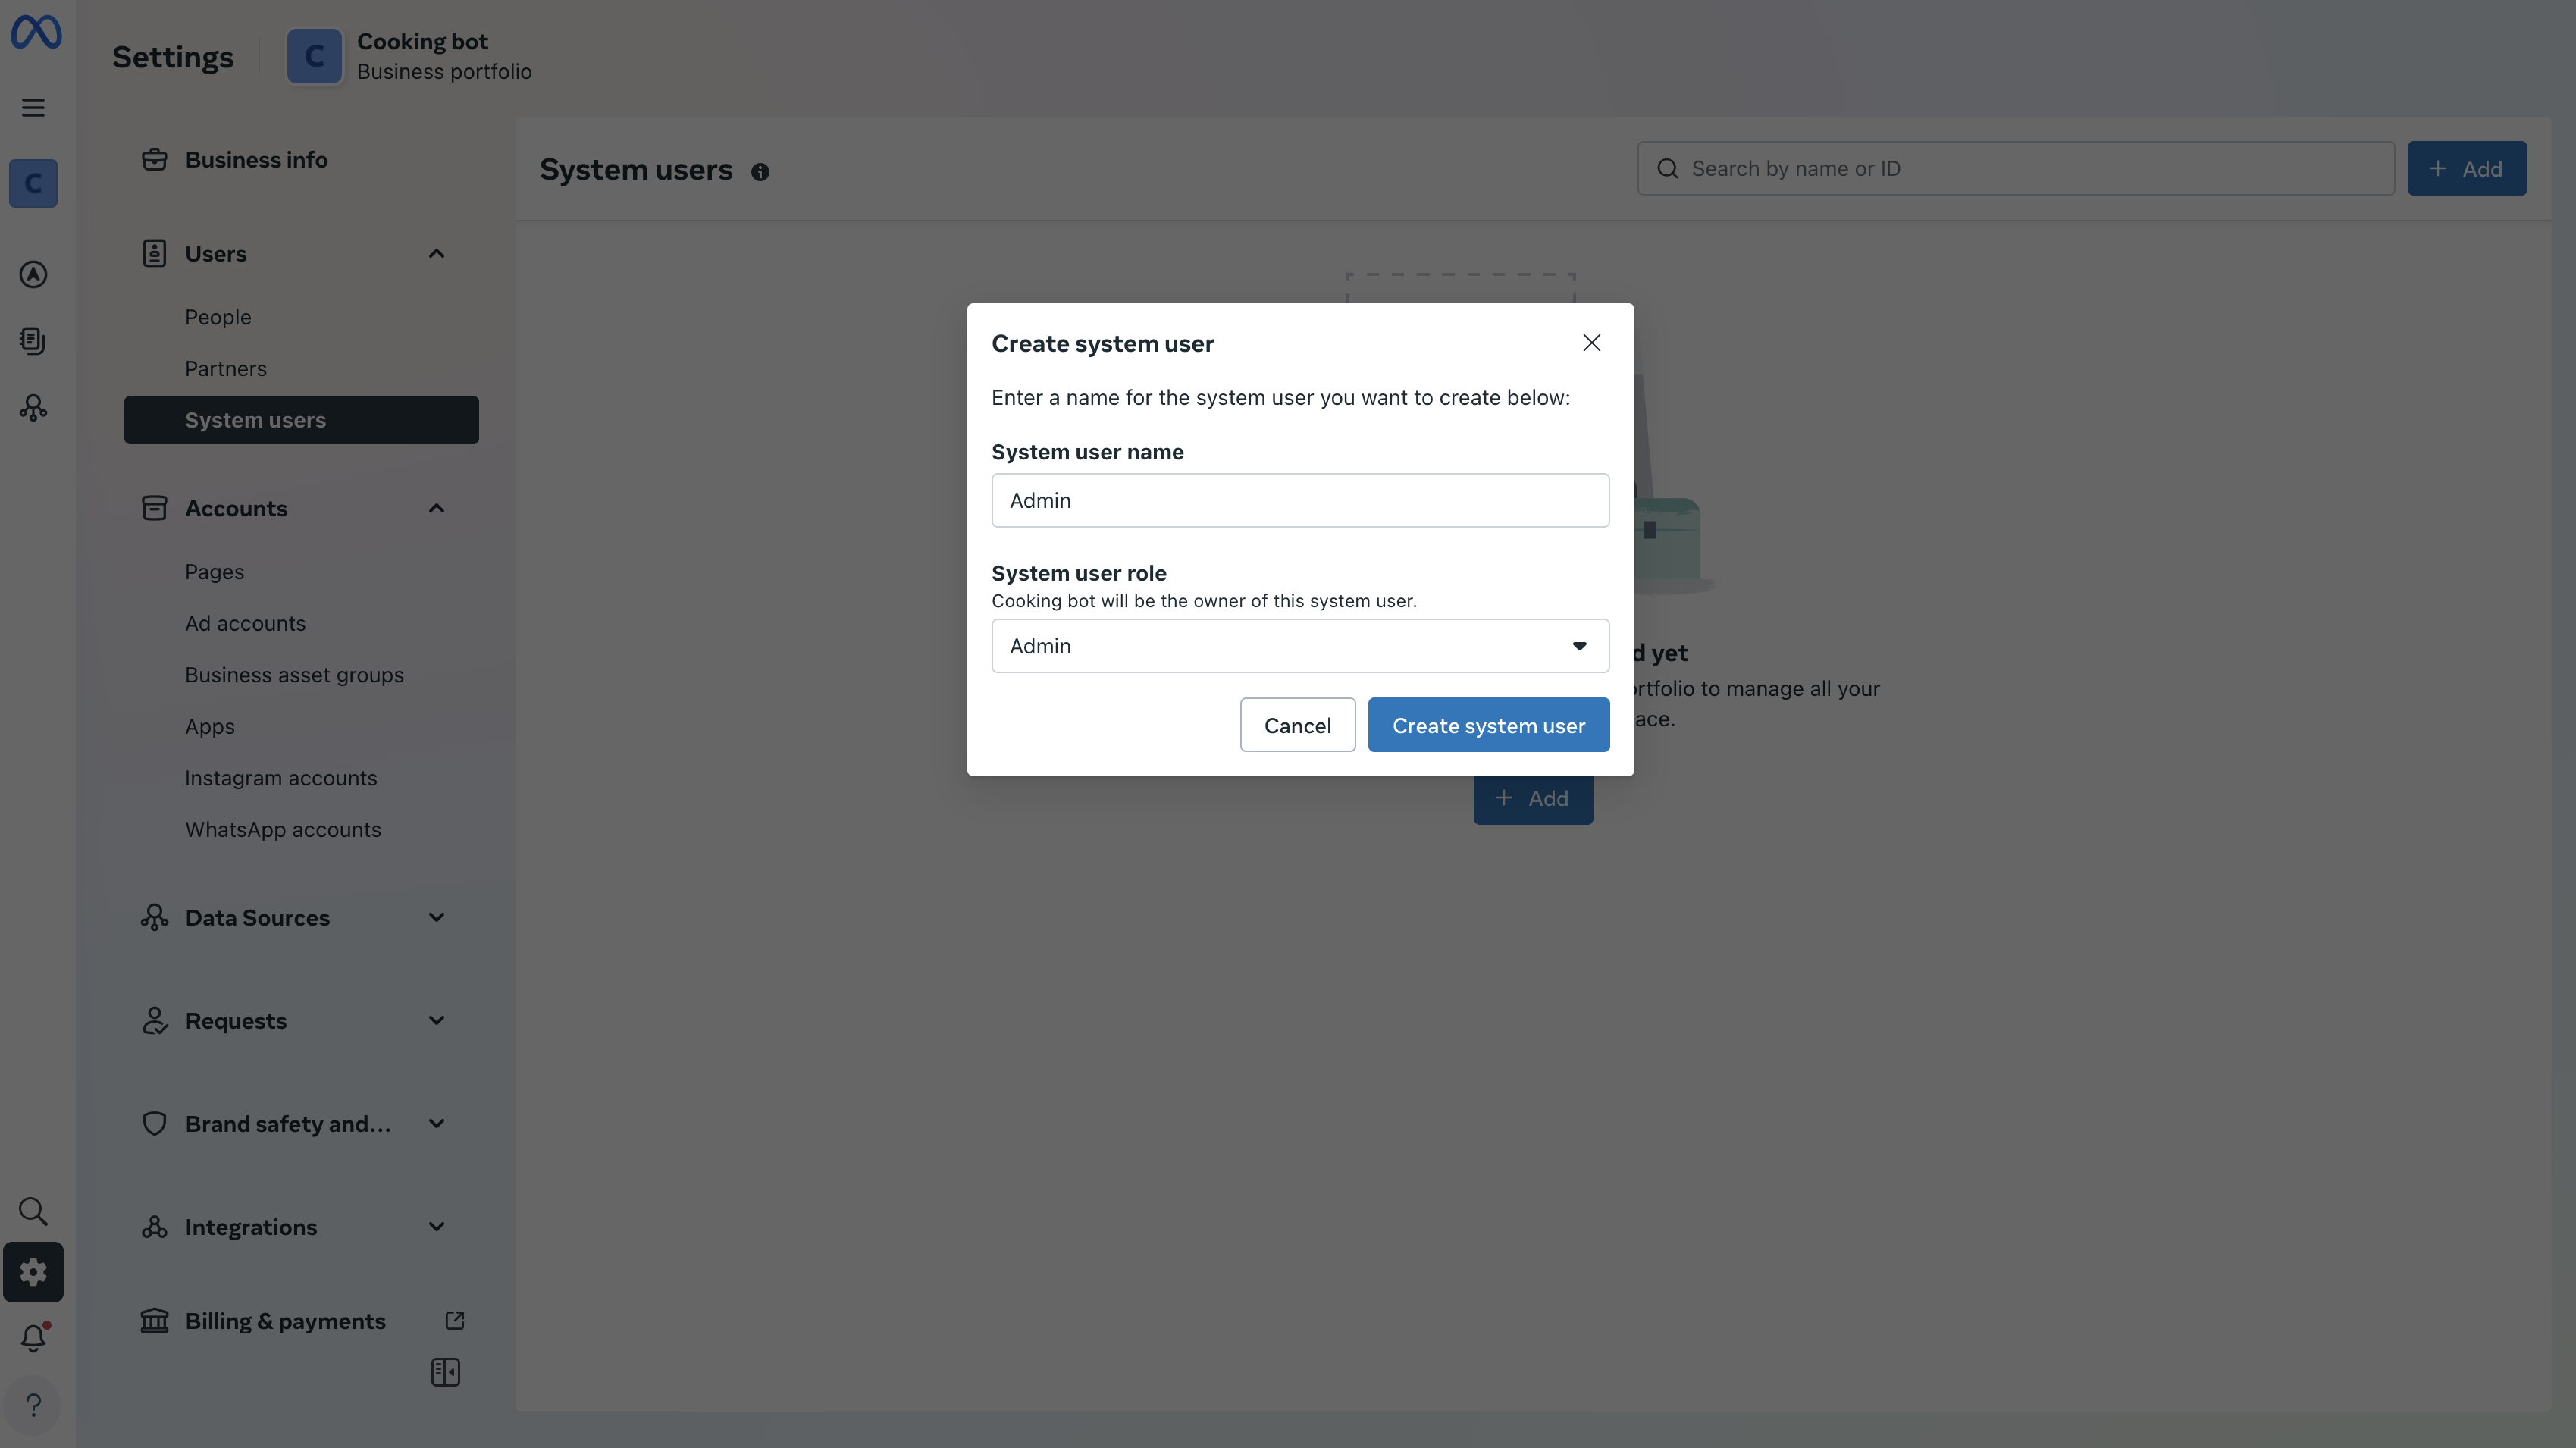
Create System User:
- You will be prompted to create a user. The name of the user can be anything, and the role should be Admin.
Note: You can also follow the official instructions for creating system users at Meta's documentation.
- You will be prompted to create a user. The name of the user can be anything, and the role should be Admin.
-
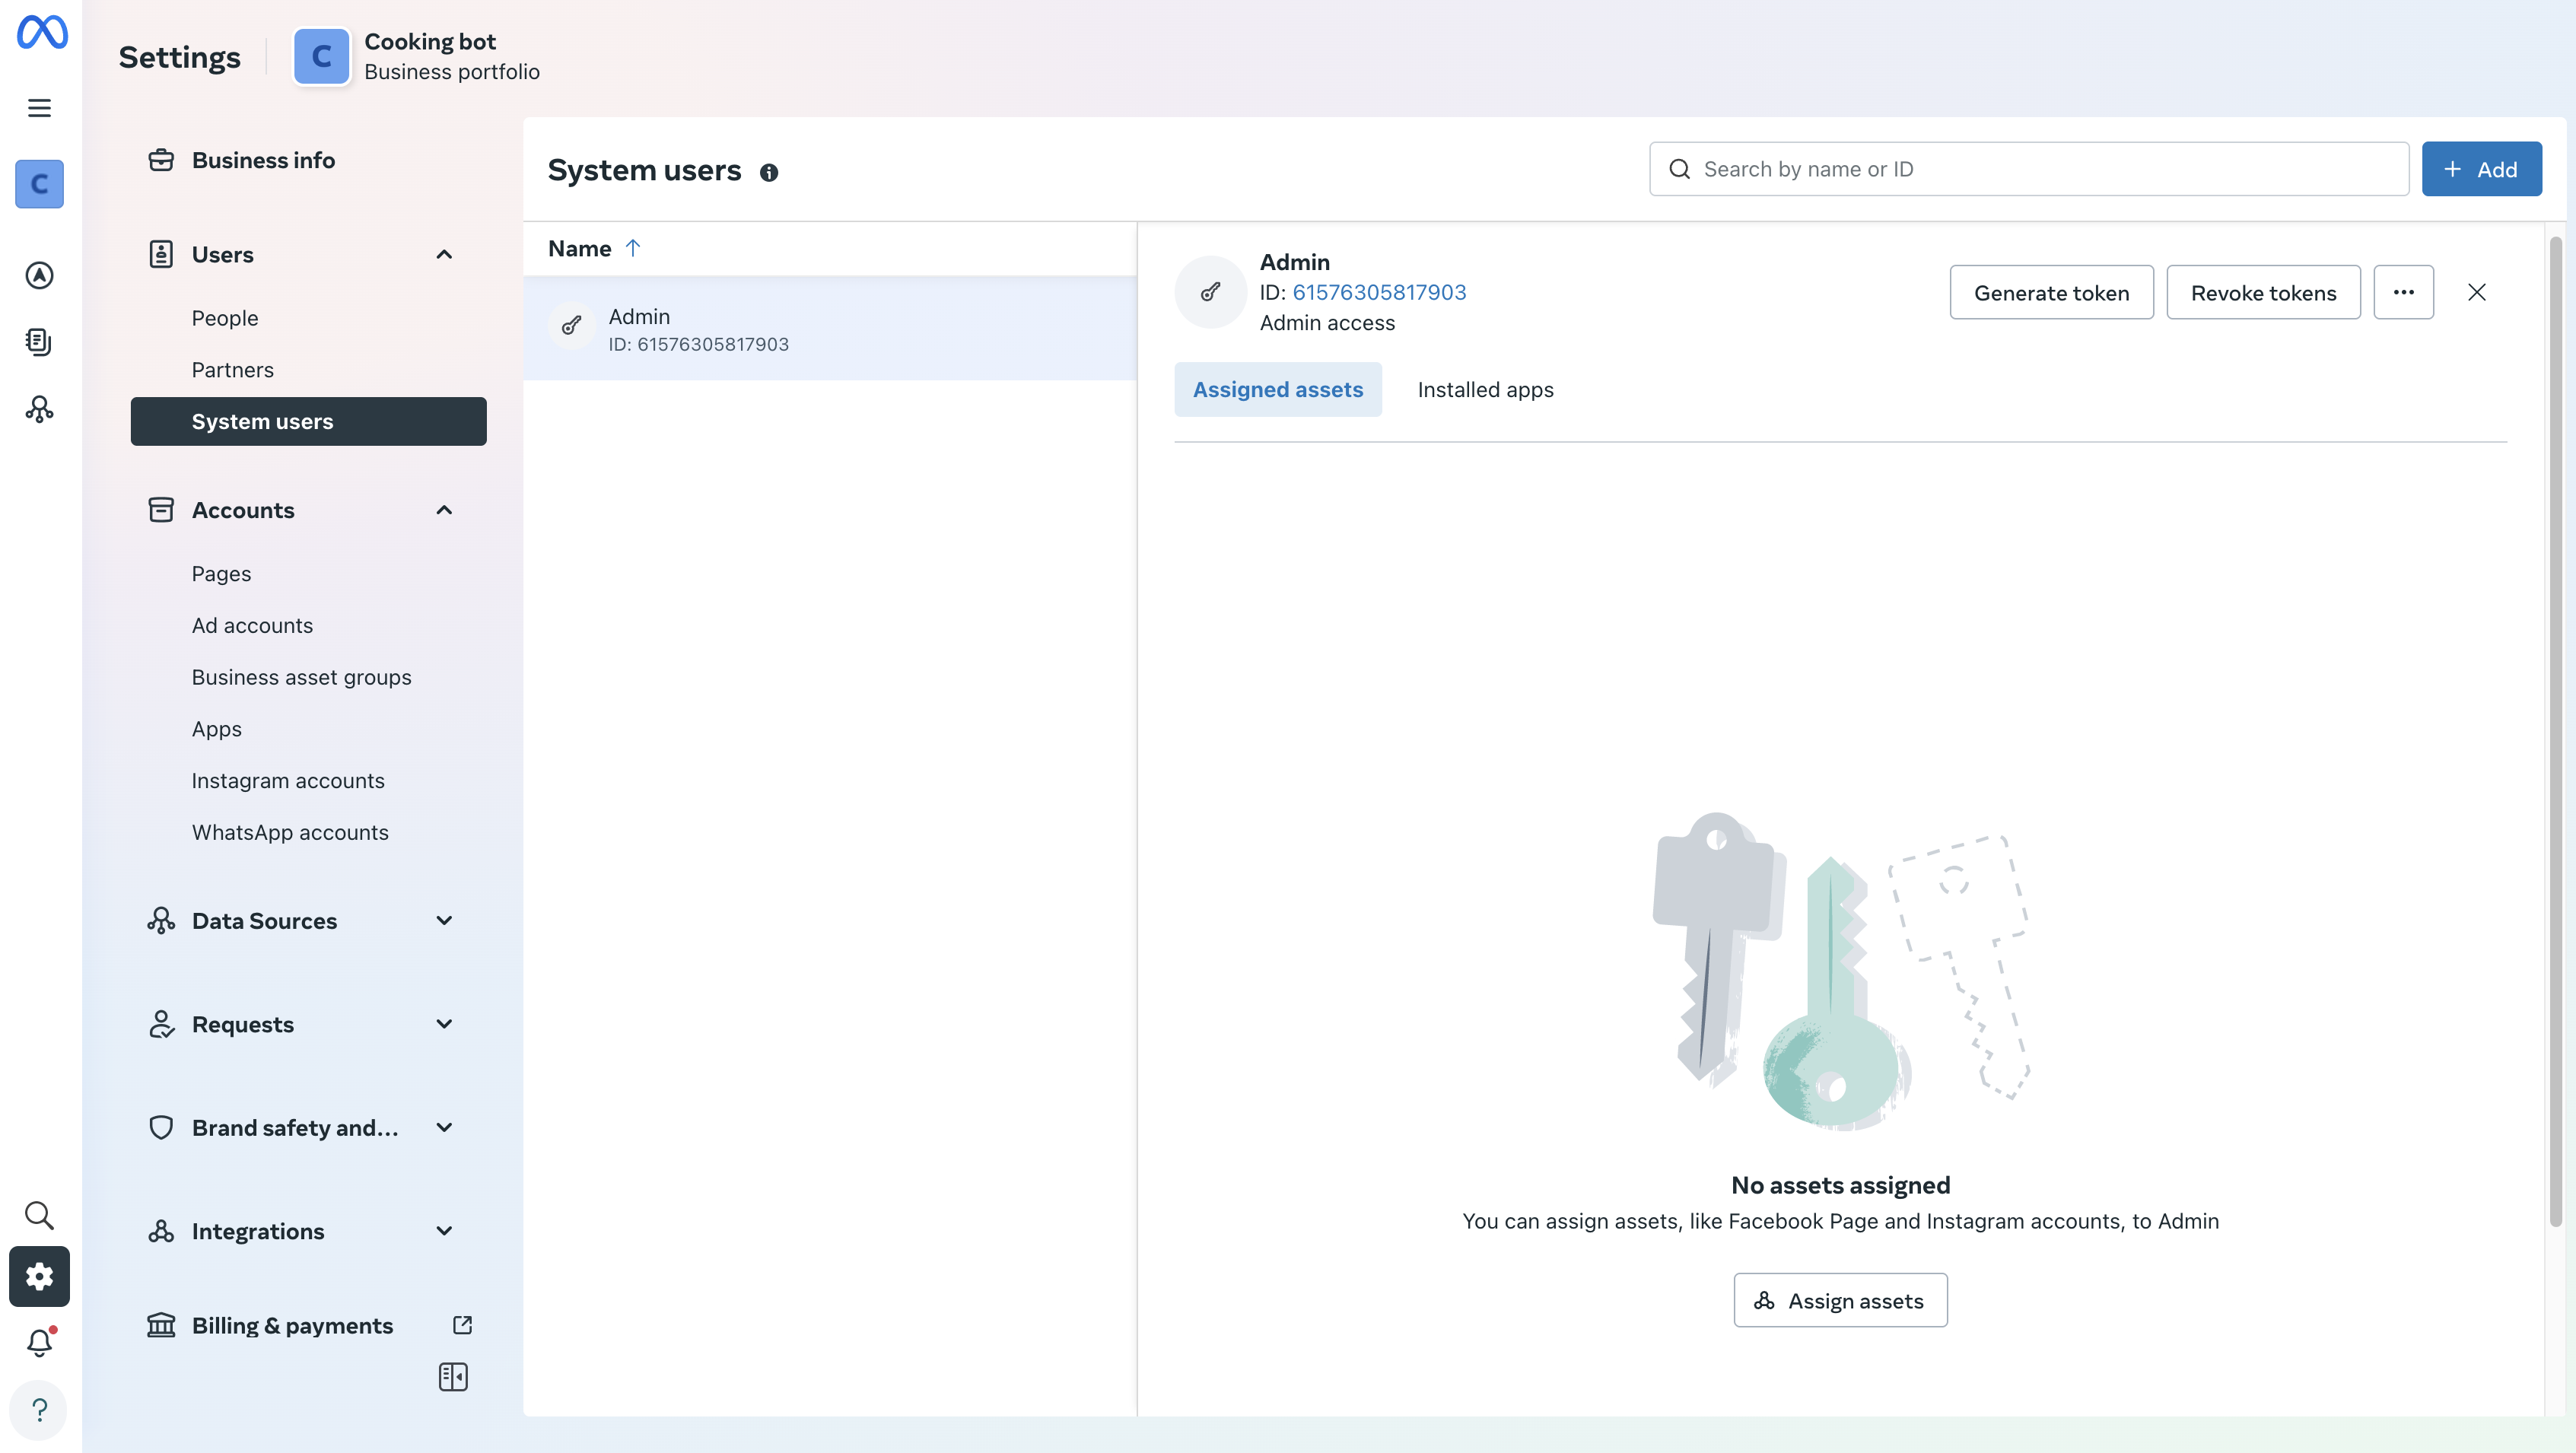
Assign Assets:
-
After creating the user, you will see a window where you need to press Assign assets.
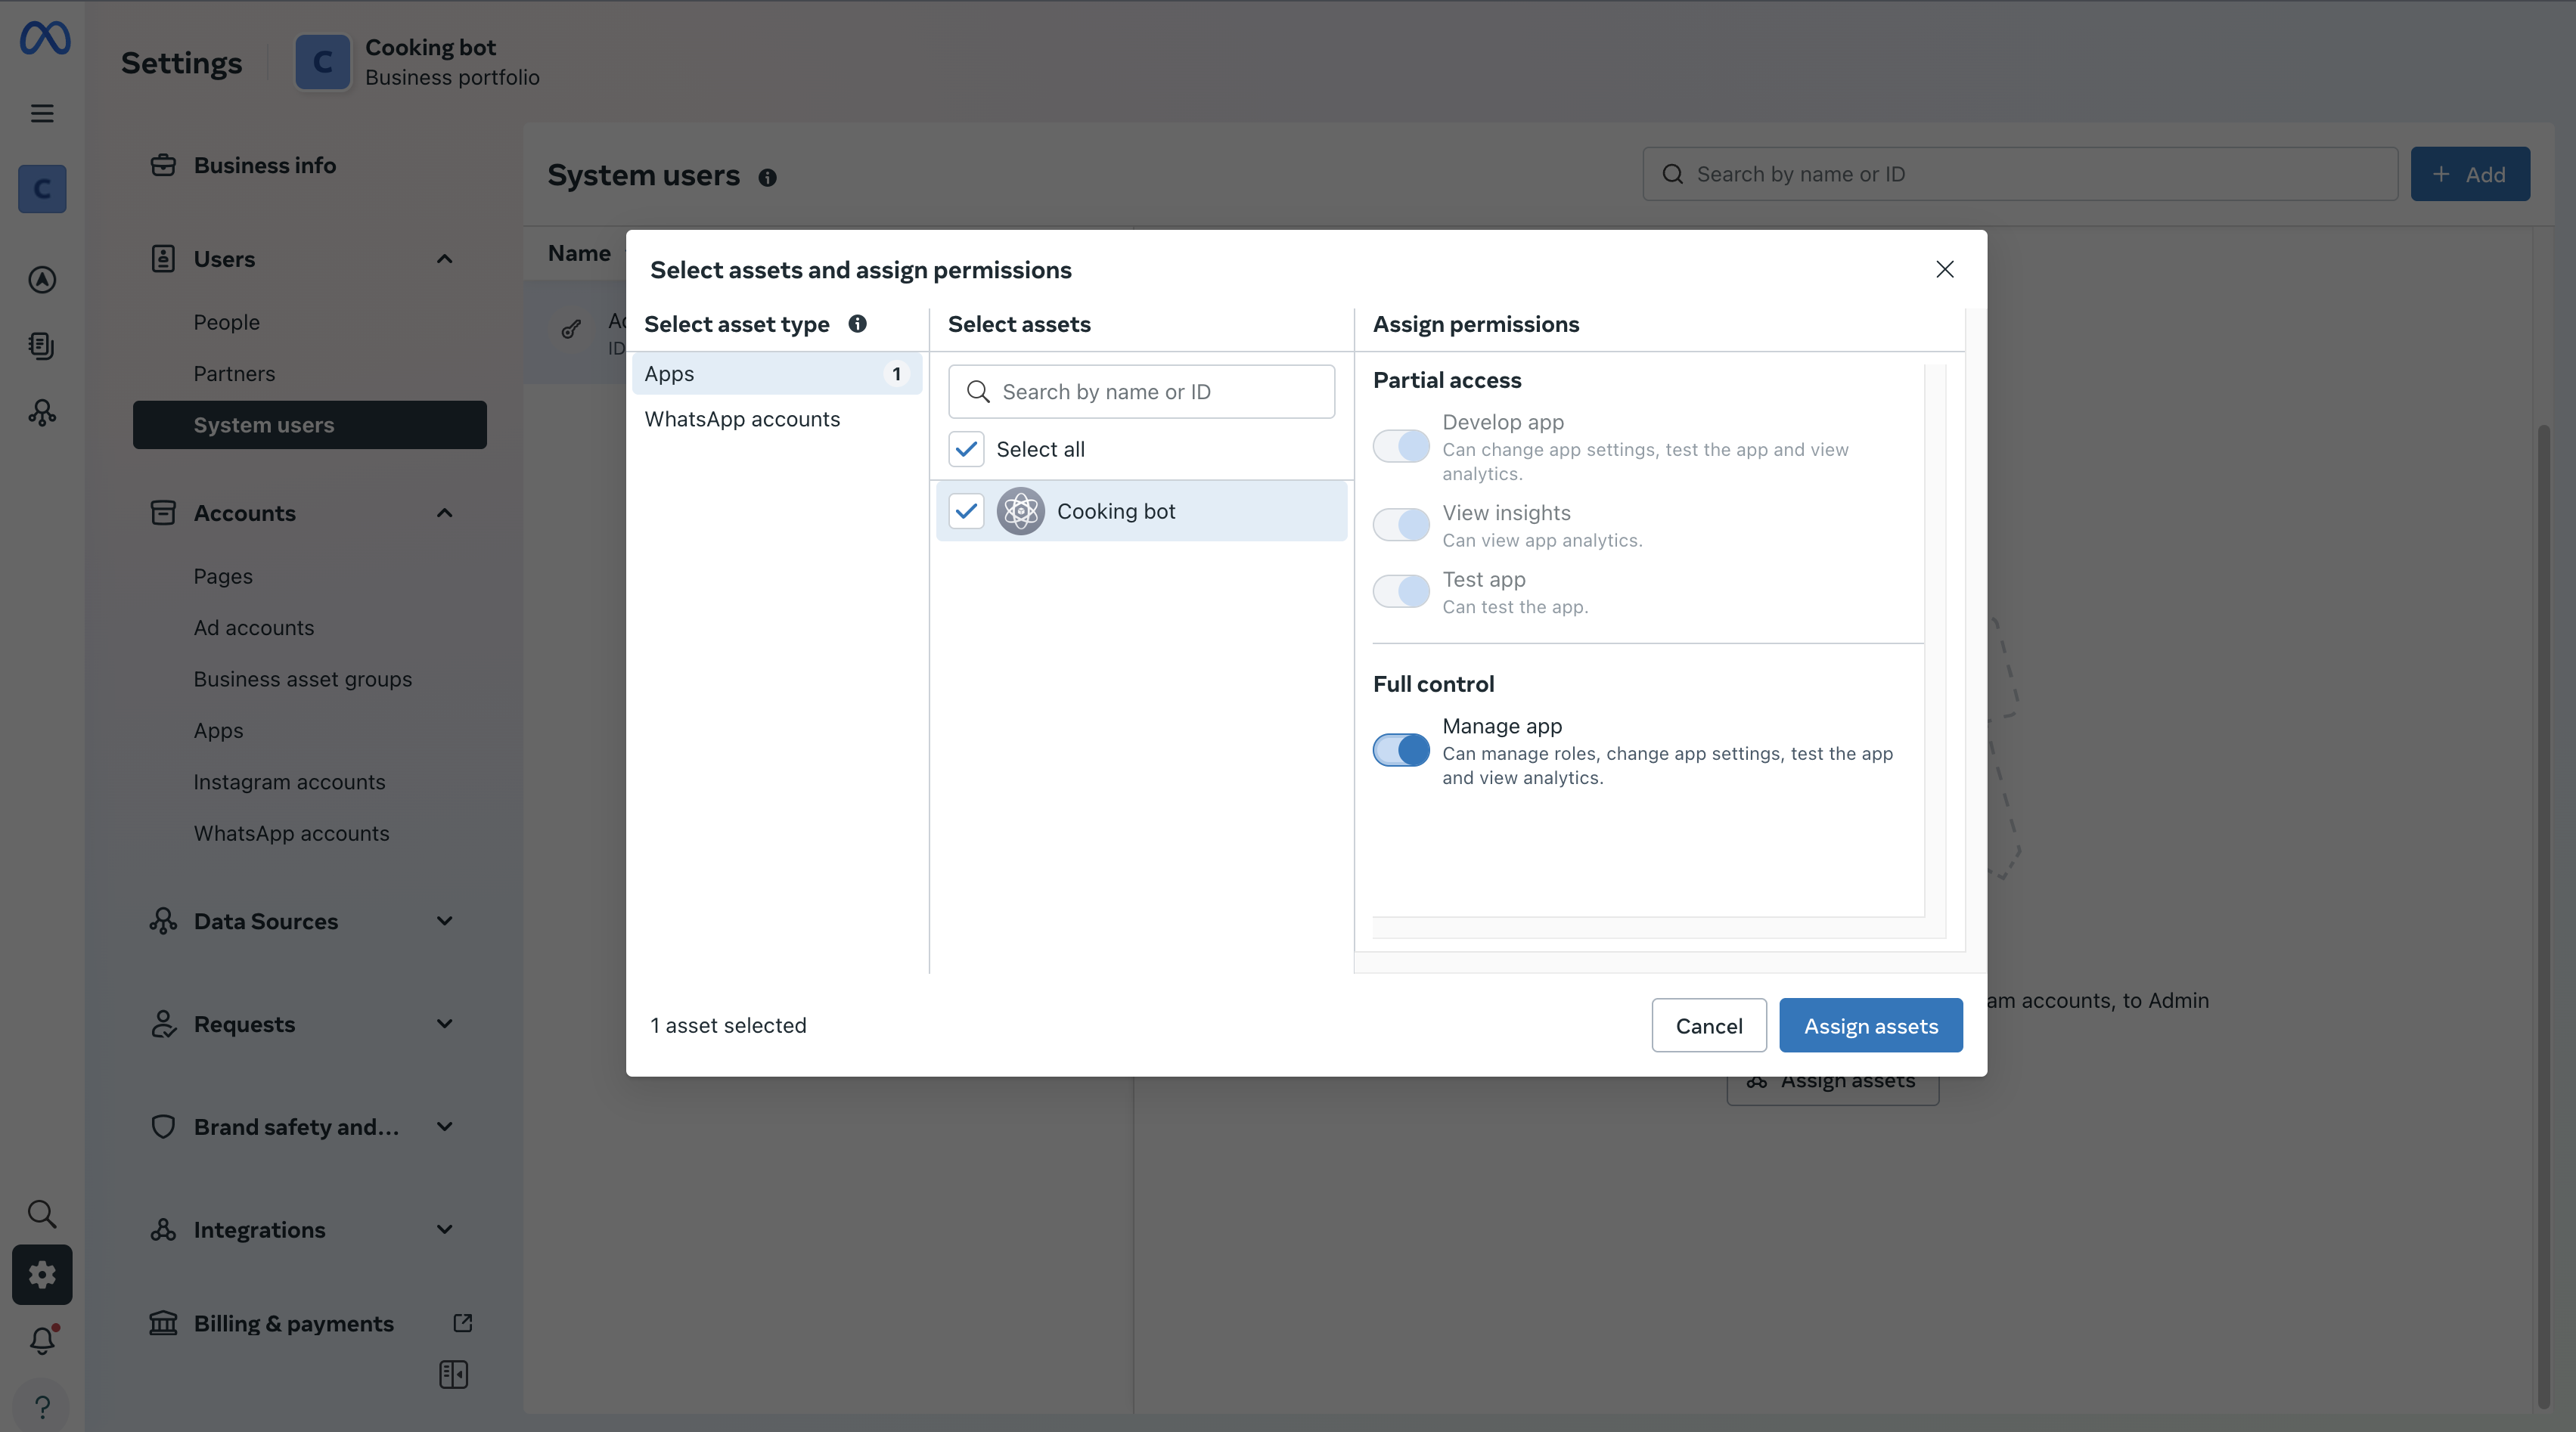
-
Select your asset (the app you created previously) and choose Full control.
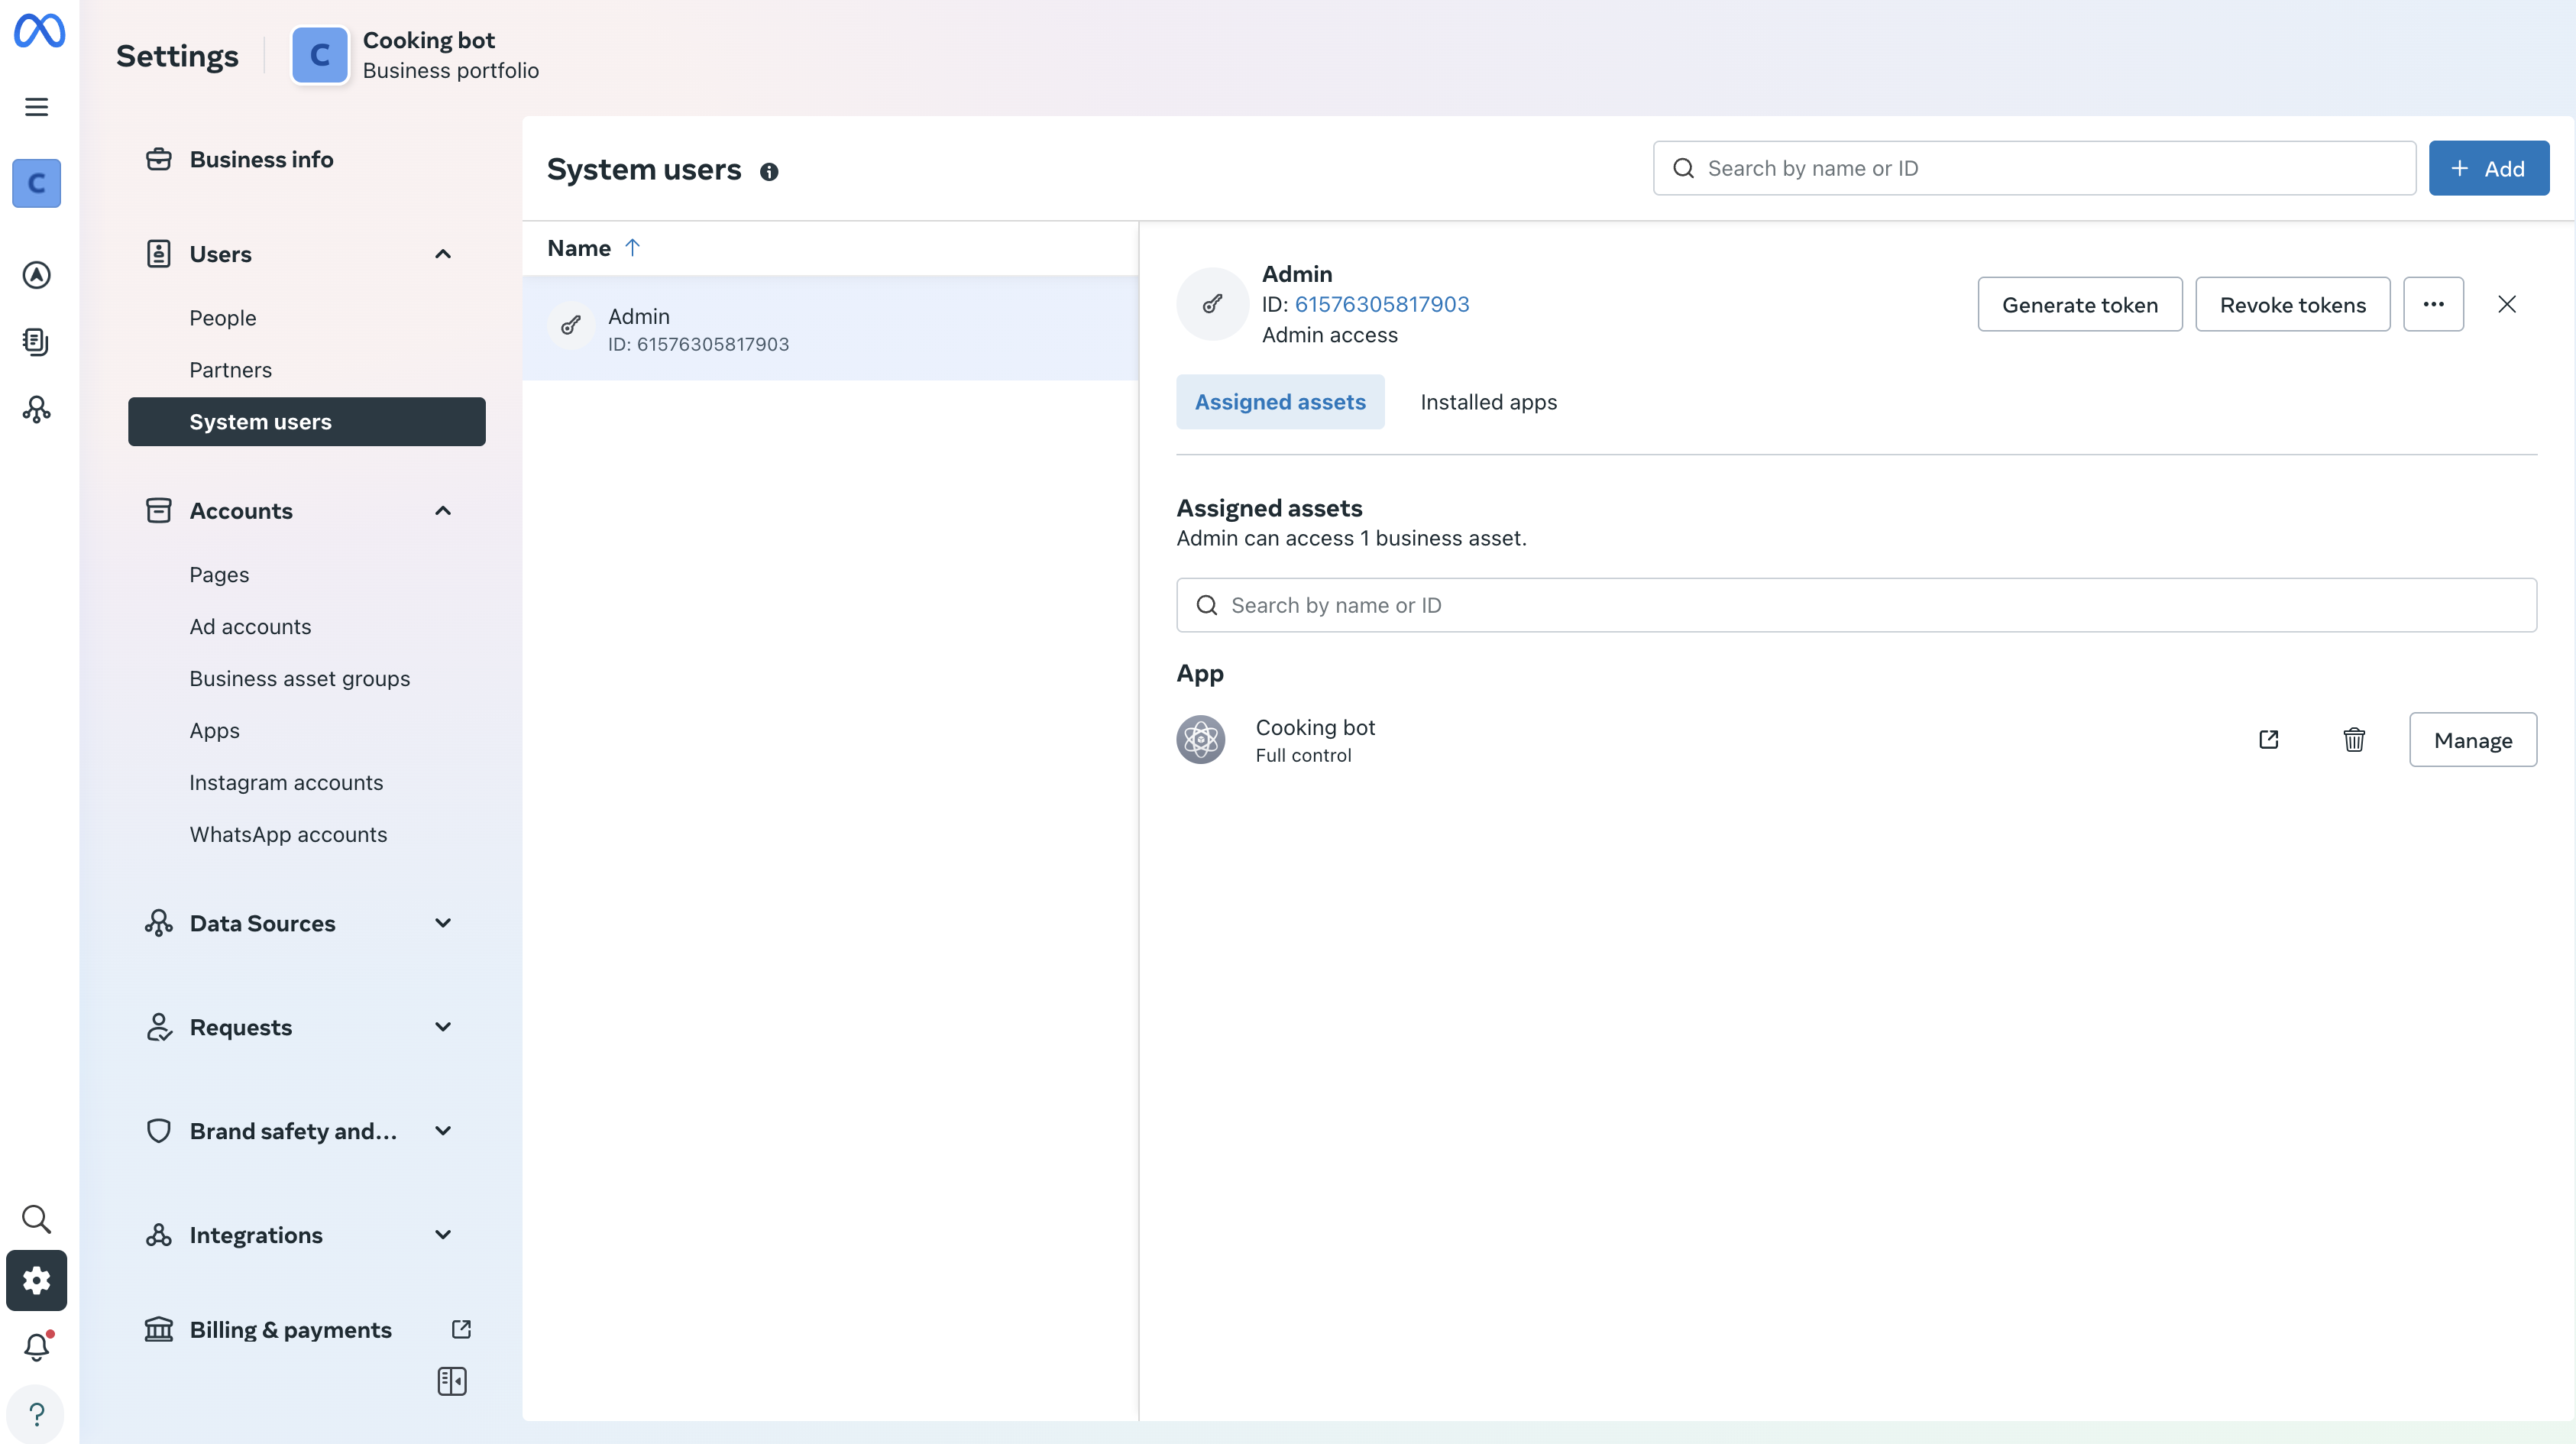
-
After assigning assets, you should see something like this:
-
-
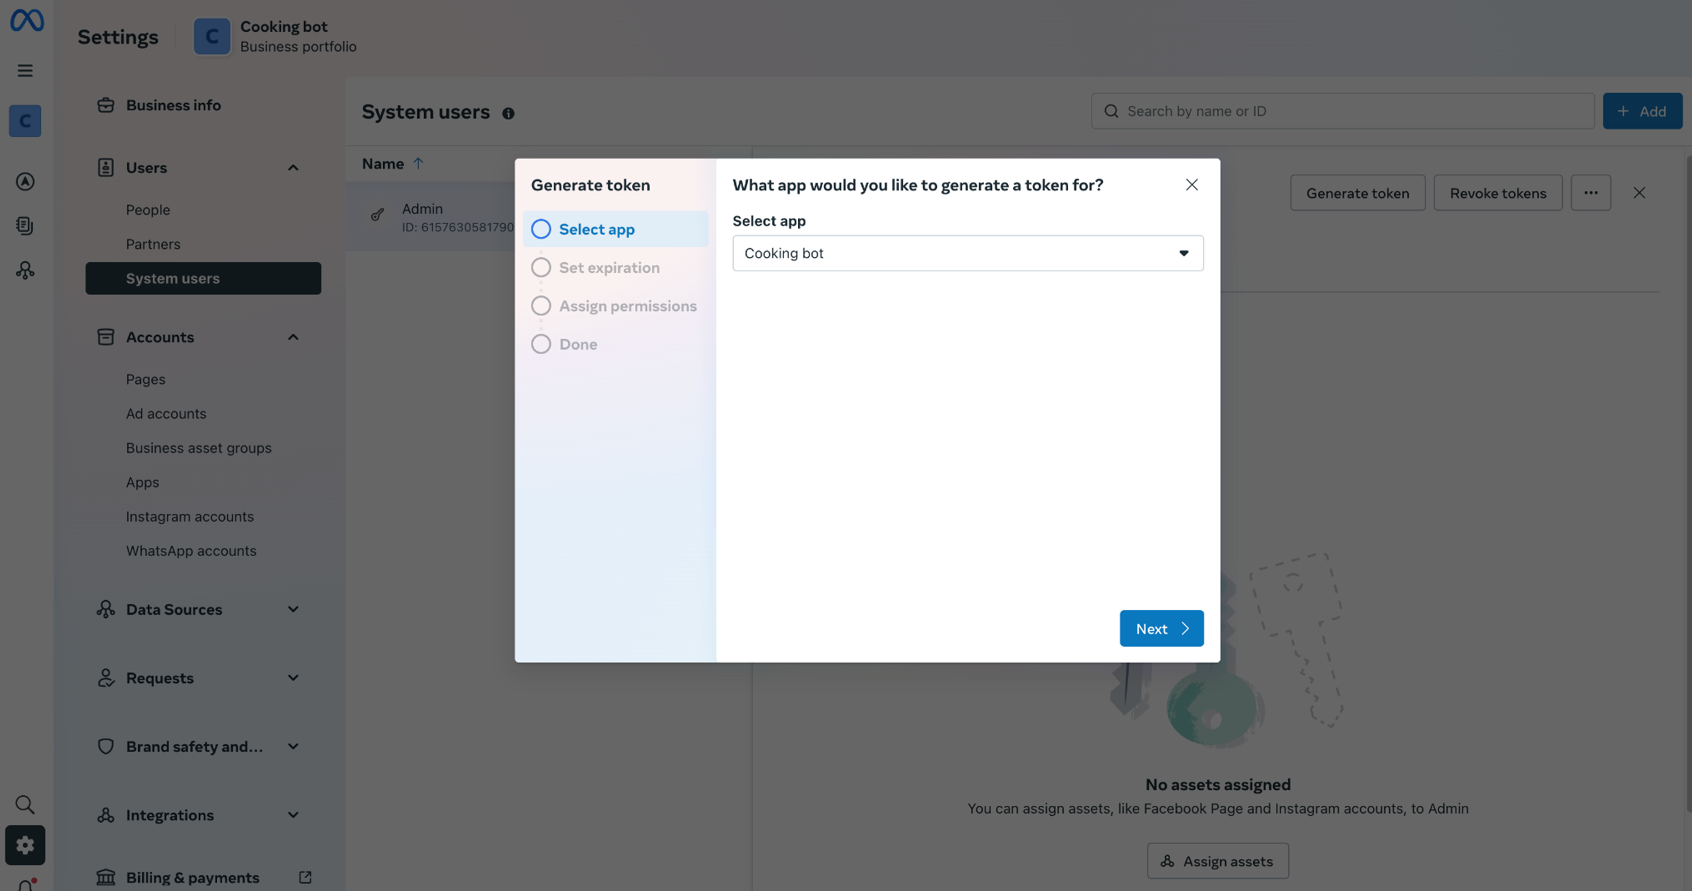
Generate Token:
-
This is a very important step: You need to Generate Token.
-
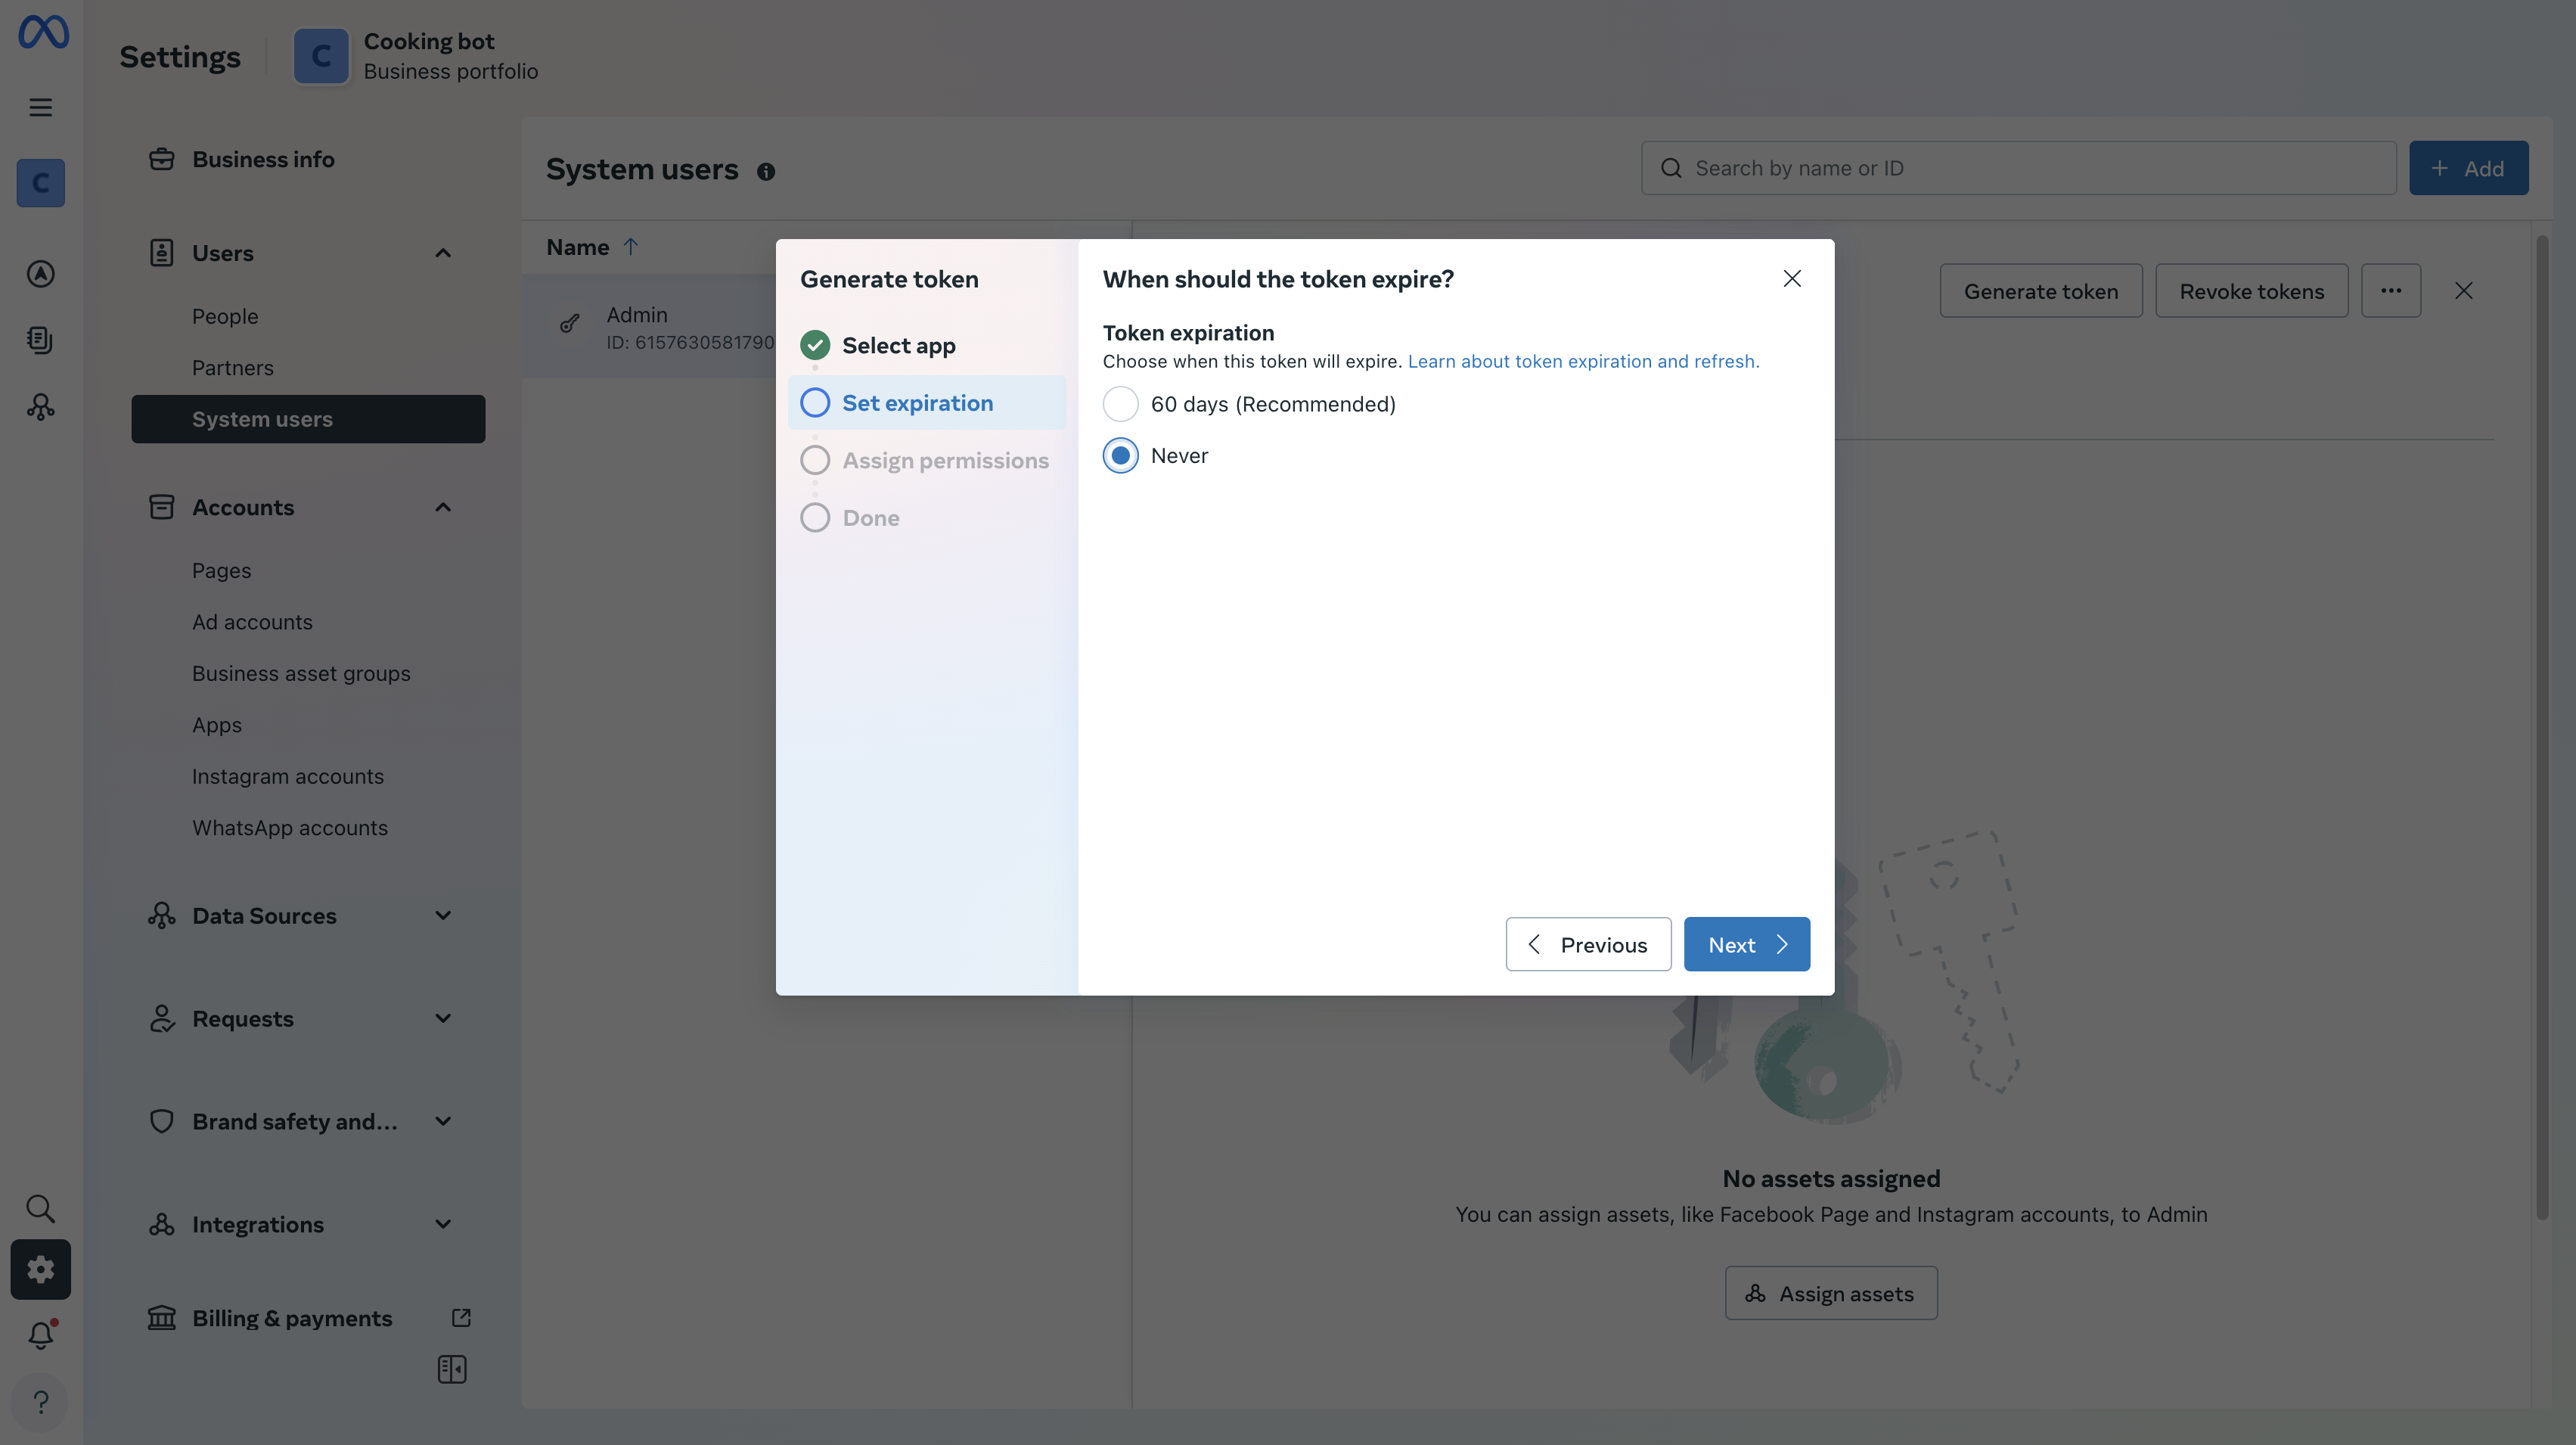
Important: In the expiration settings, you need to choose Never. If you don't want to update it every 60 days in our app, and you forget to do it, your bot will not work.
-
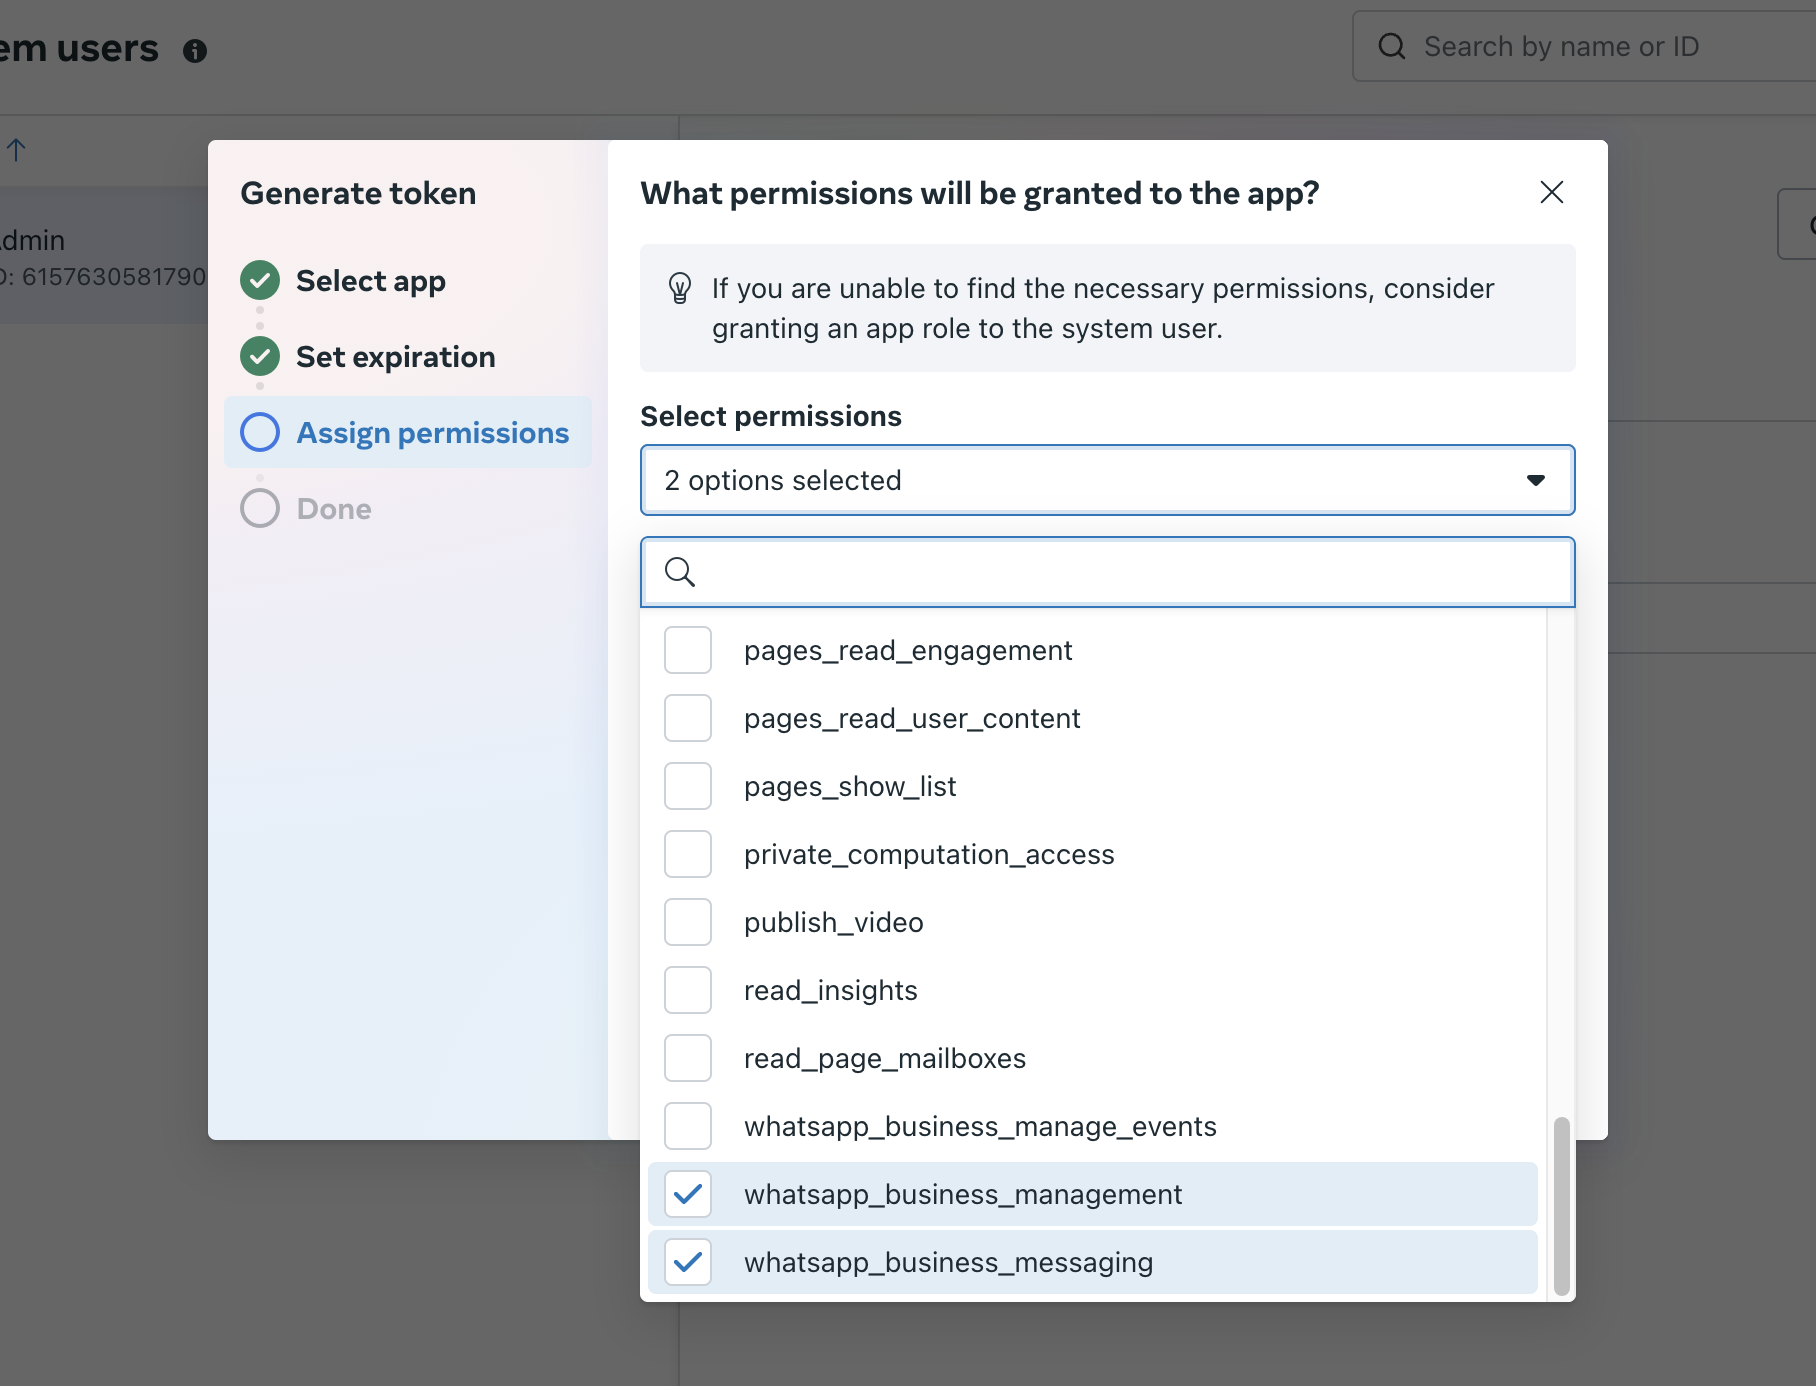
Under permissions, you need to choose whatsapp_business_management and whatsapp_business_messaging. All other options are up to you.
-
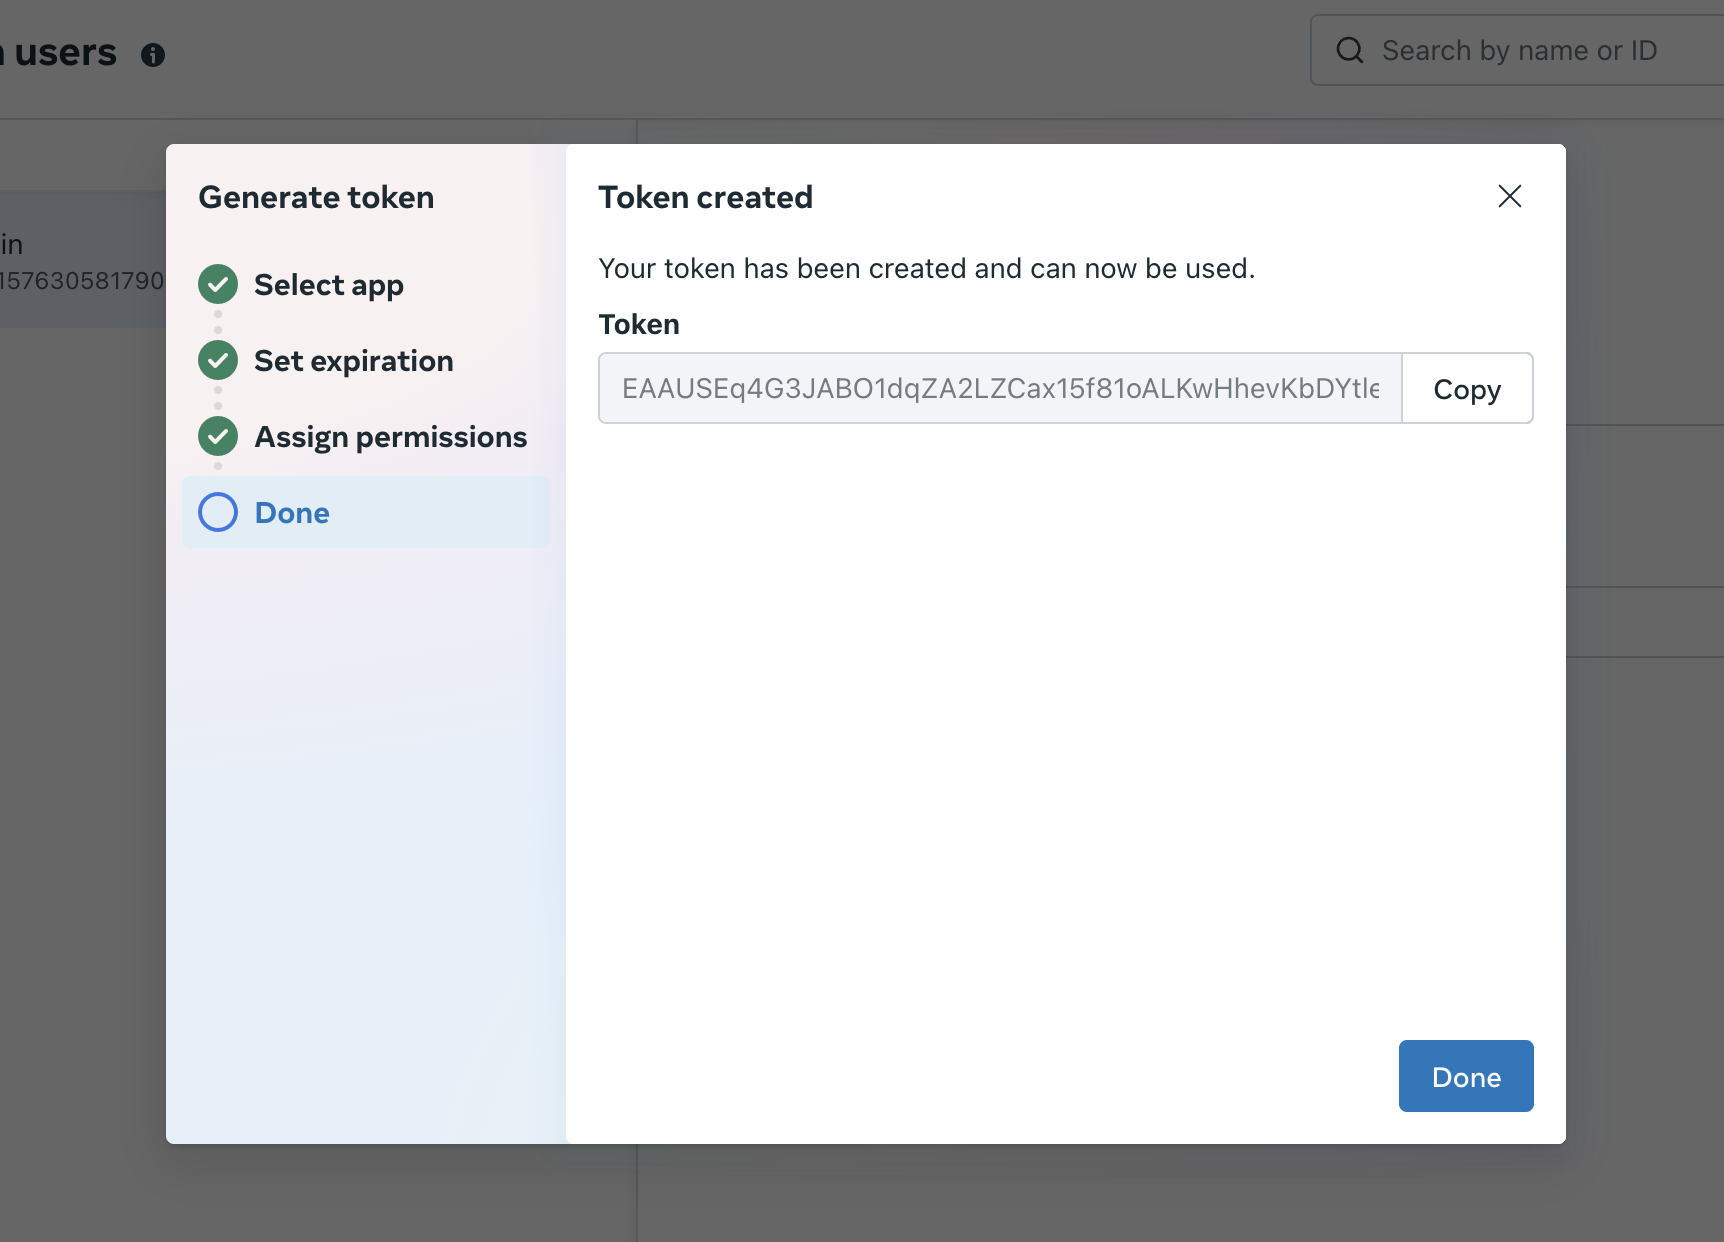
Copy the generated token and save it securely.
-
-
Finalize Bot Creation:
- Return to the Mingleego platform at Social Bots where you have opened the window for creating your WhatsApp bot.
- Paste your generated permanent token into the Token field, and click Create. Congratulations, you have a bot!
Integrating with Mingleego
With the Meta Developer App configured, integrate the WhatsApp bot with the Mingleego platform:
-
Create a Social Bot:
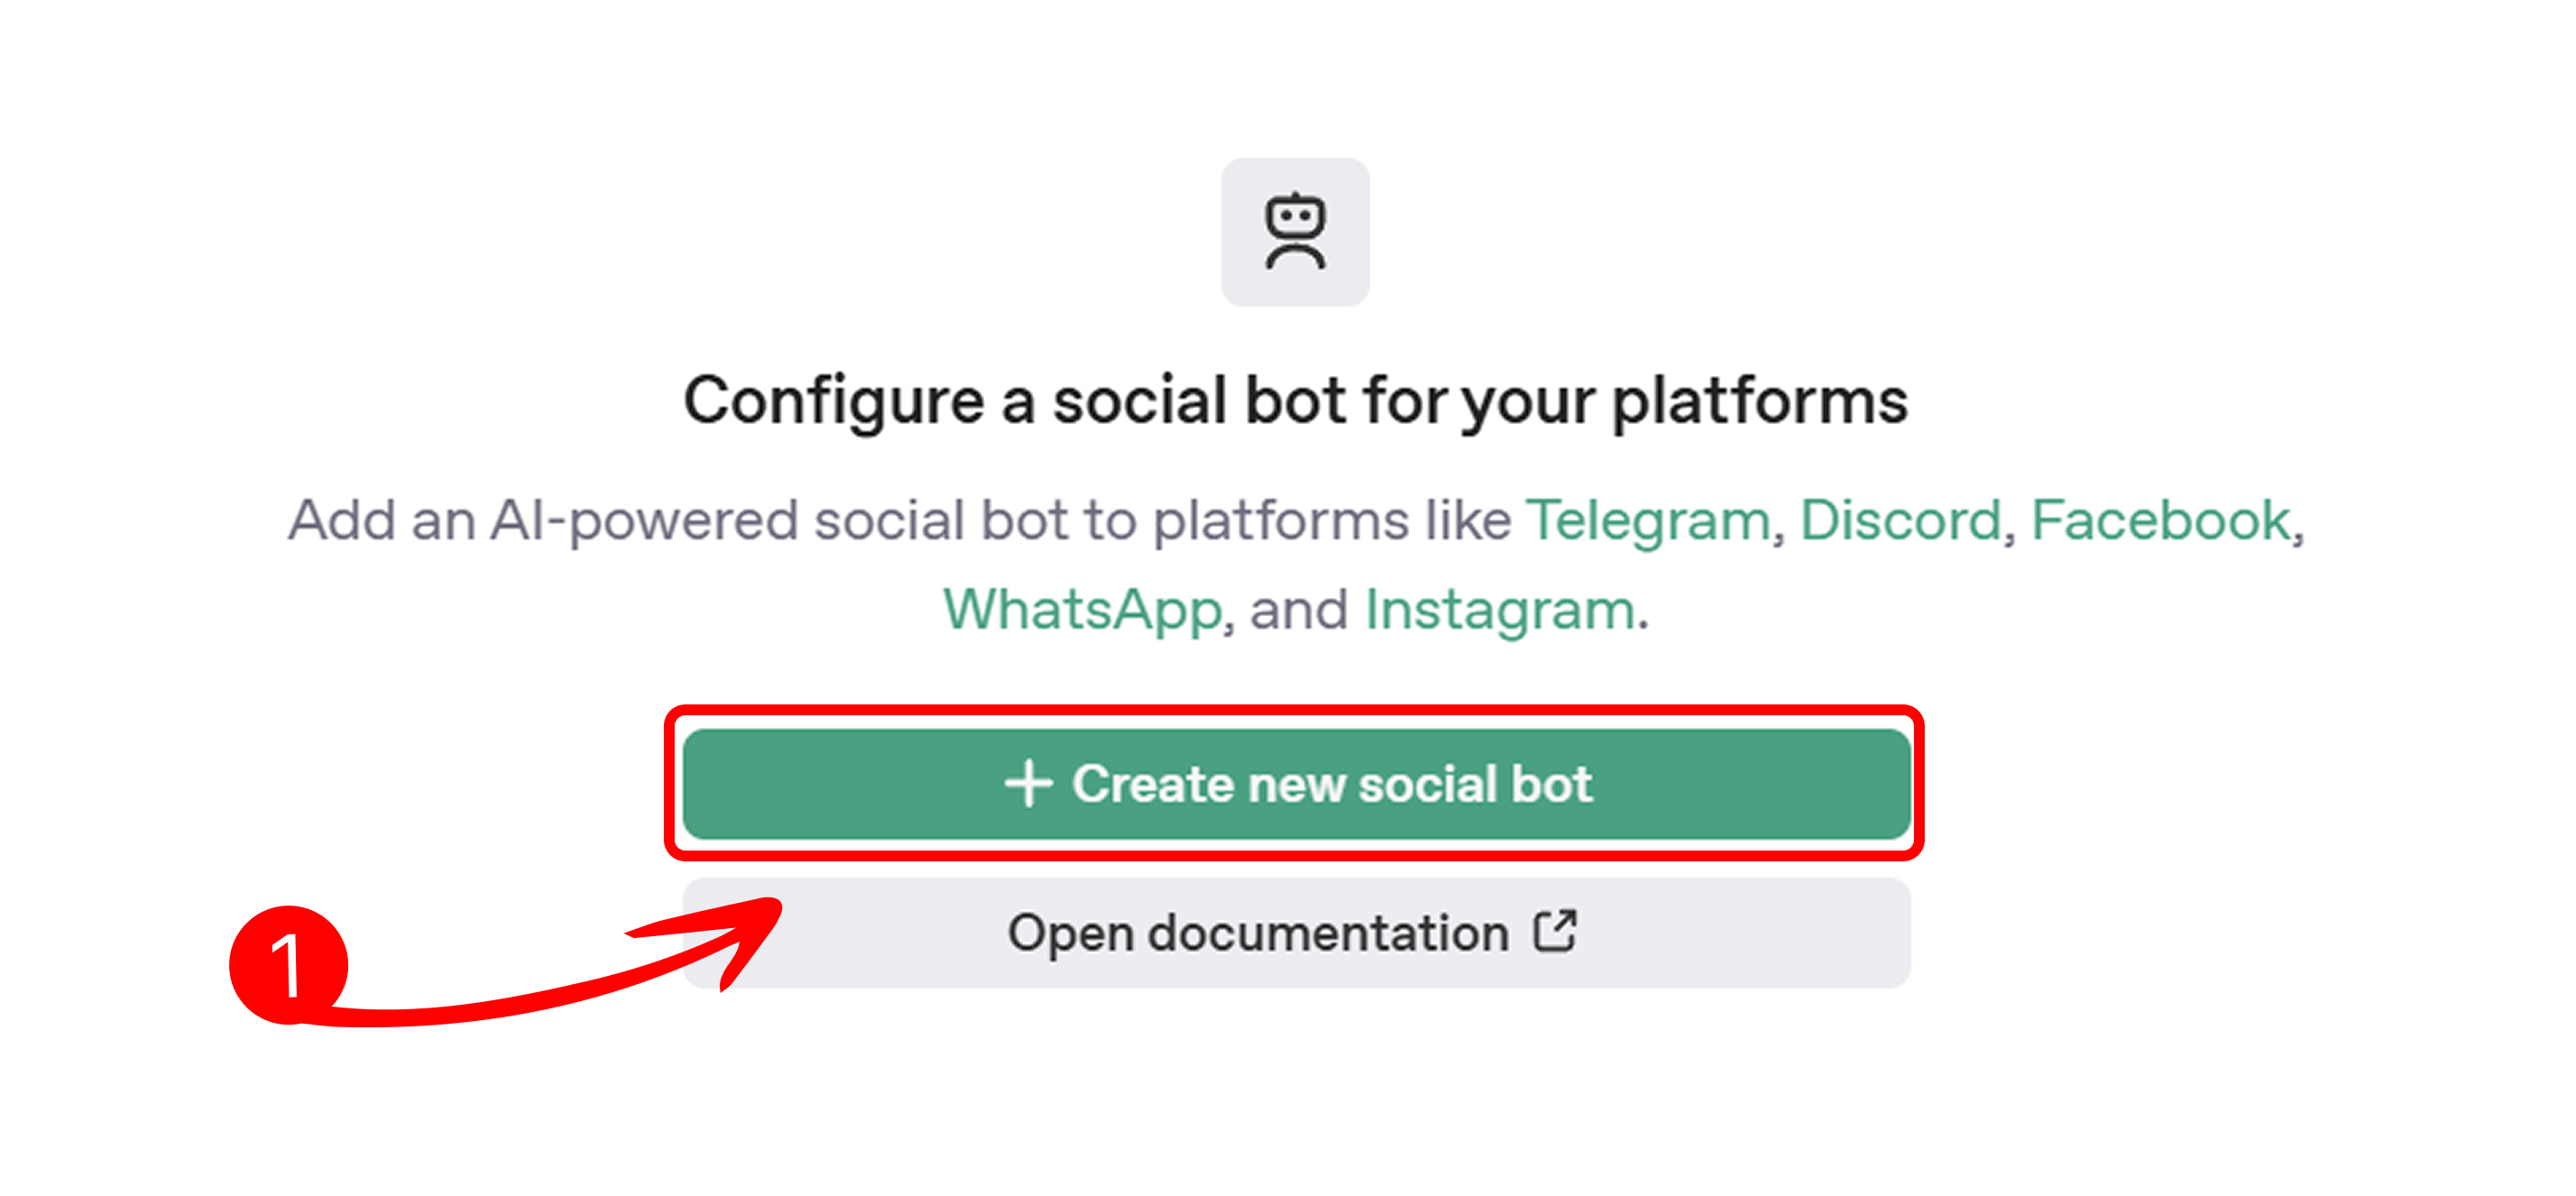
- On the Mingleego platform, navigate to Social Bots.
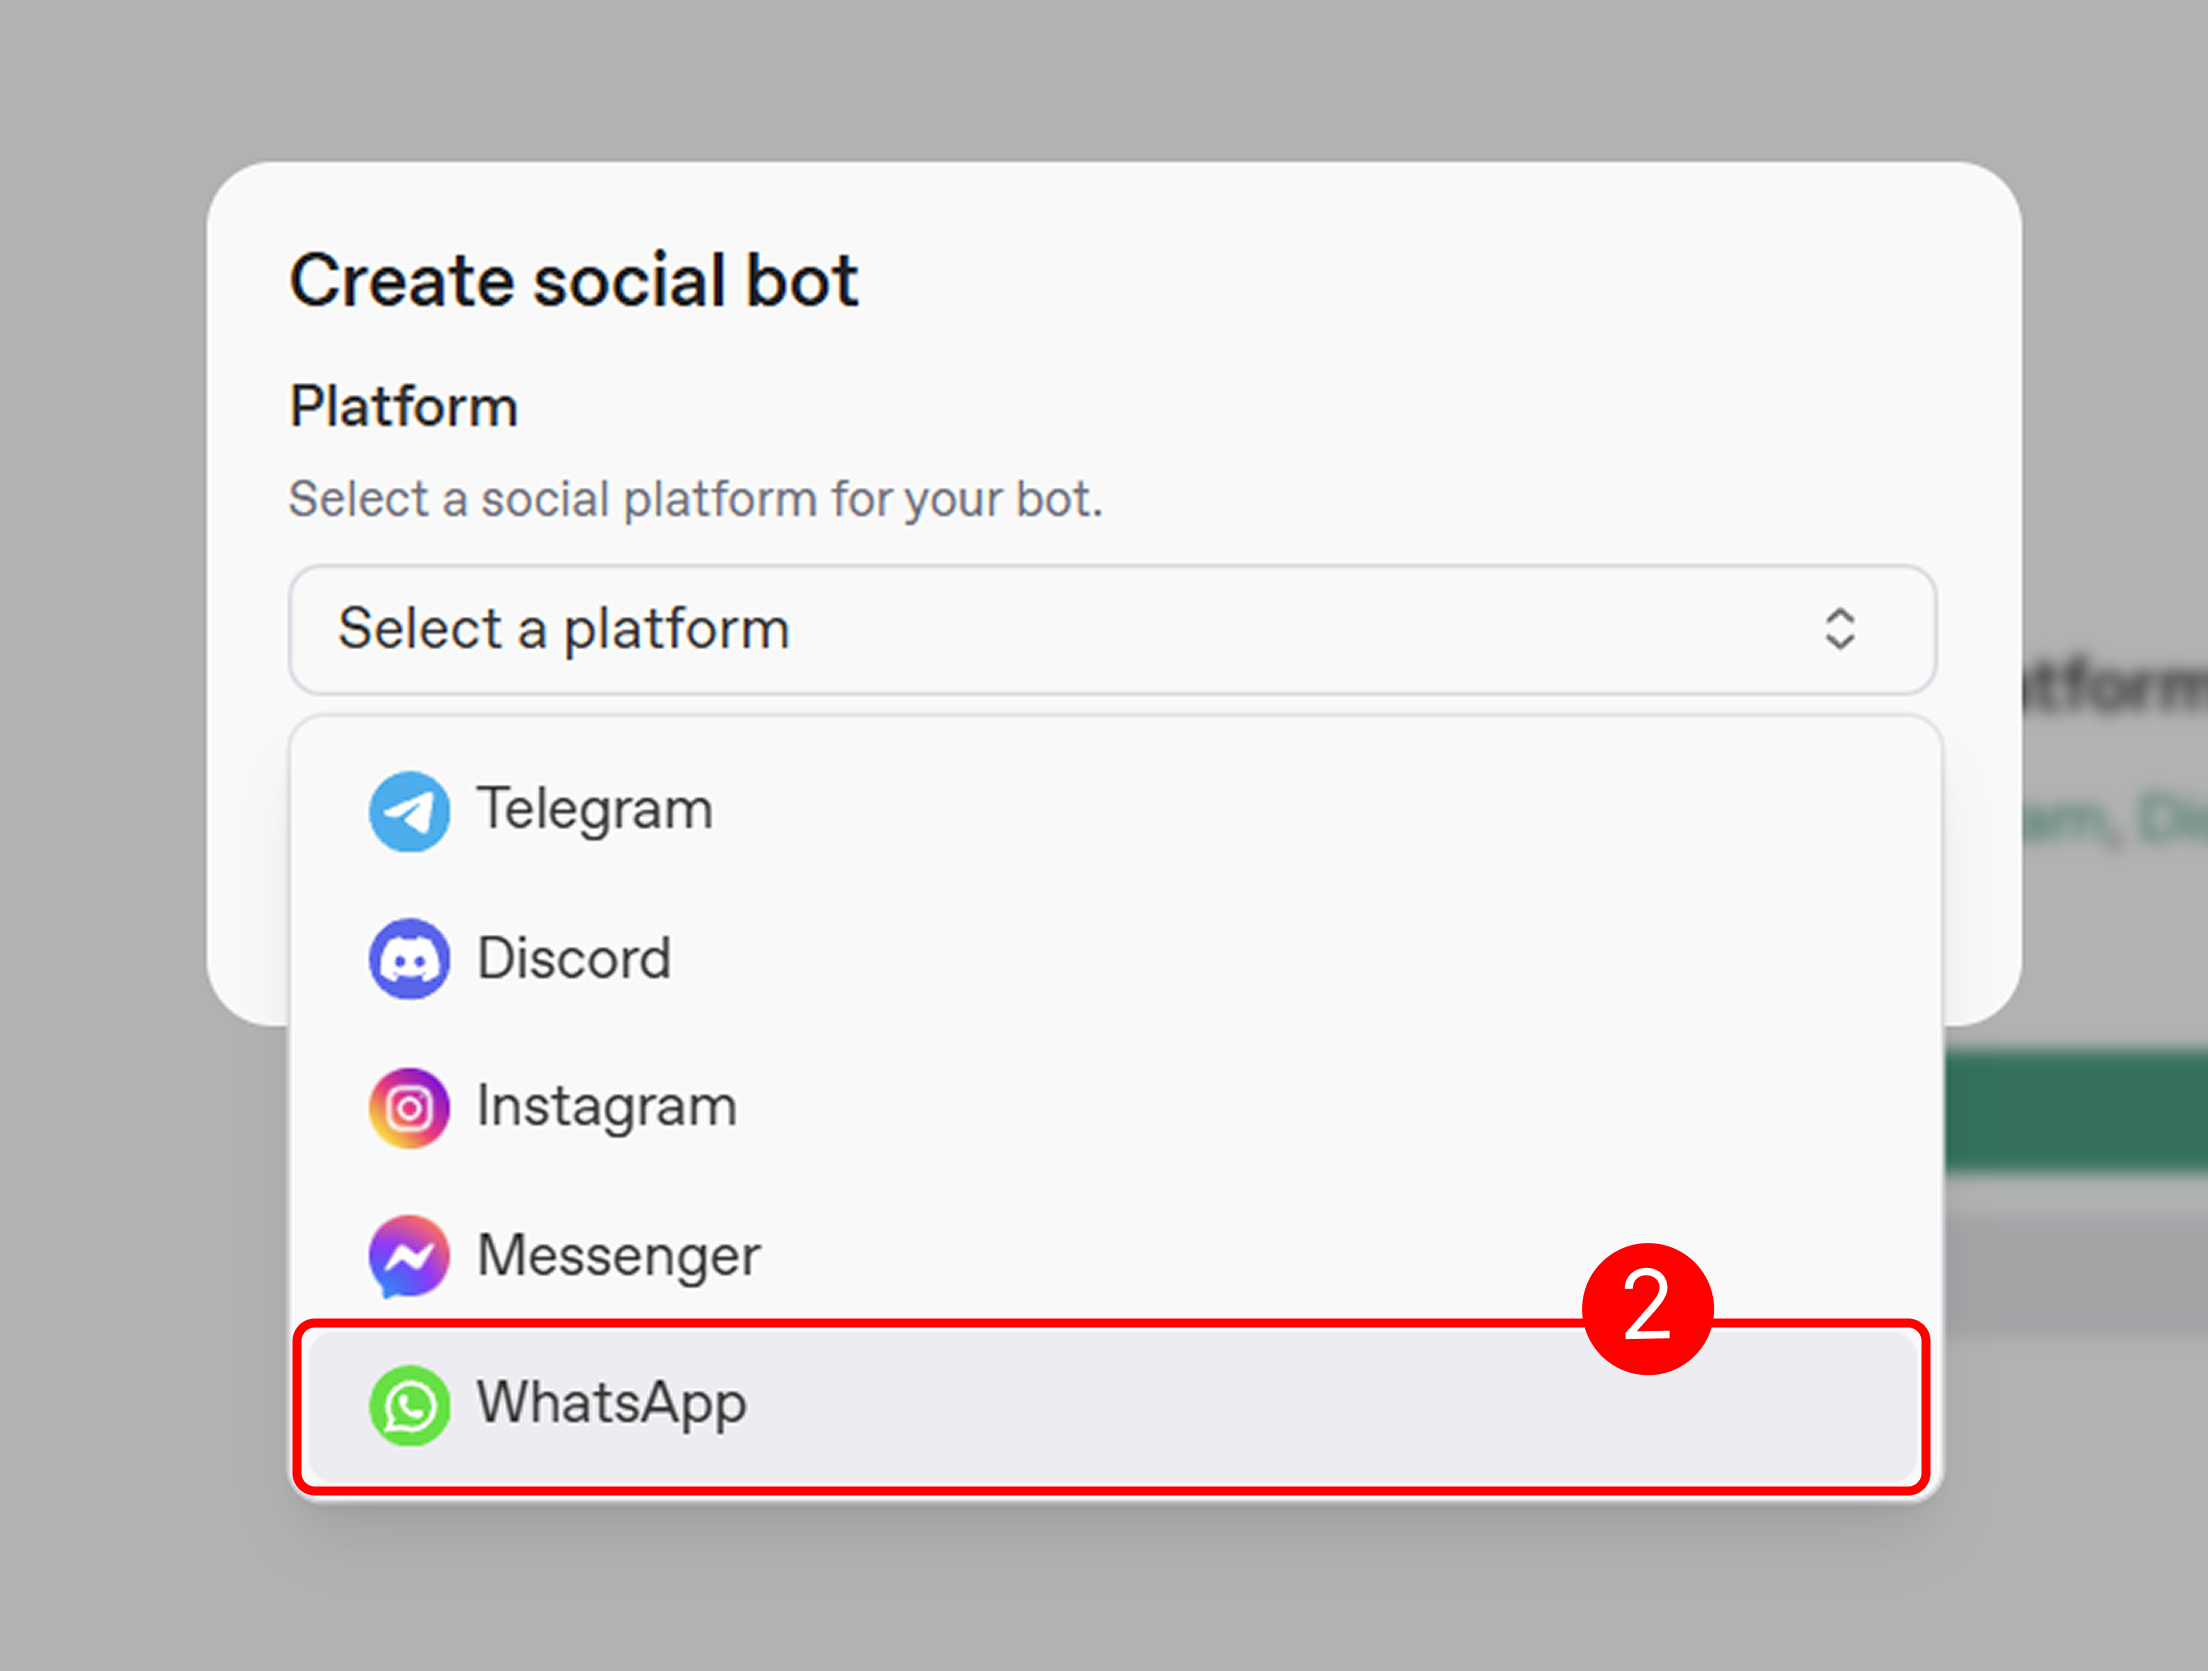
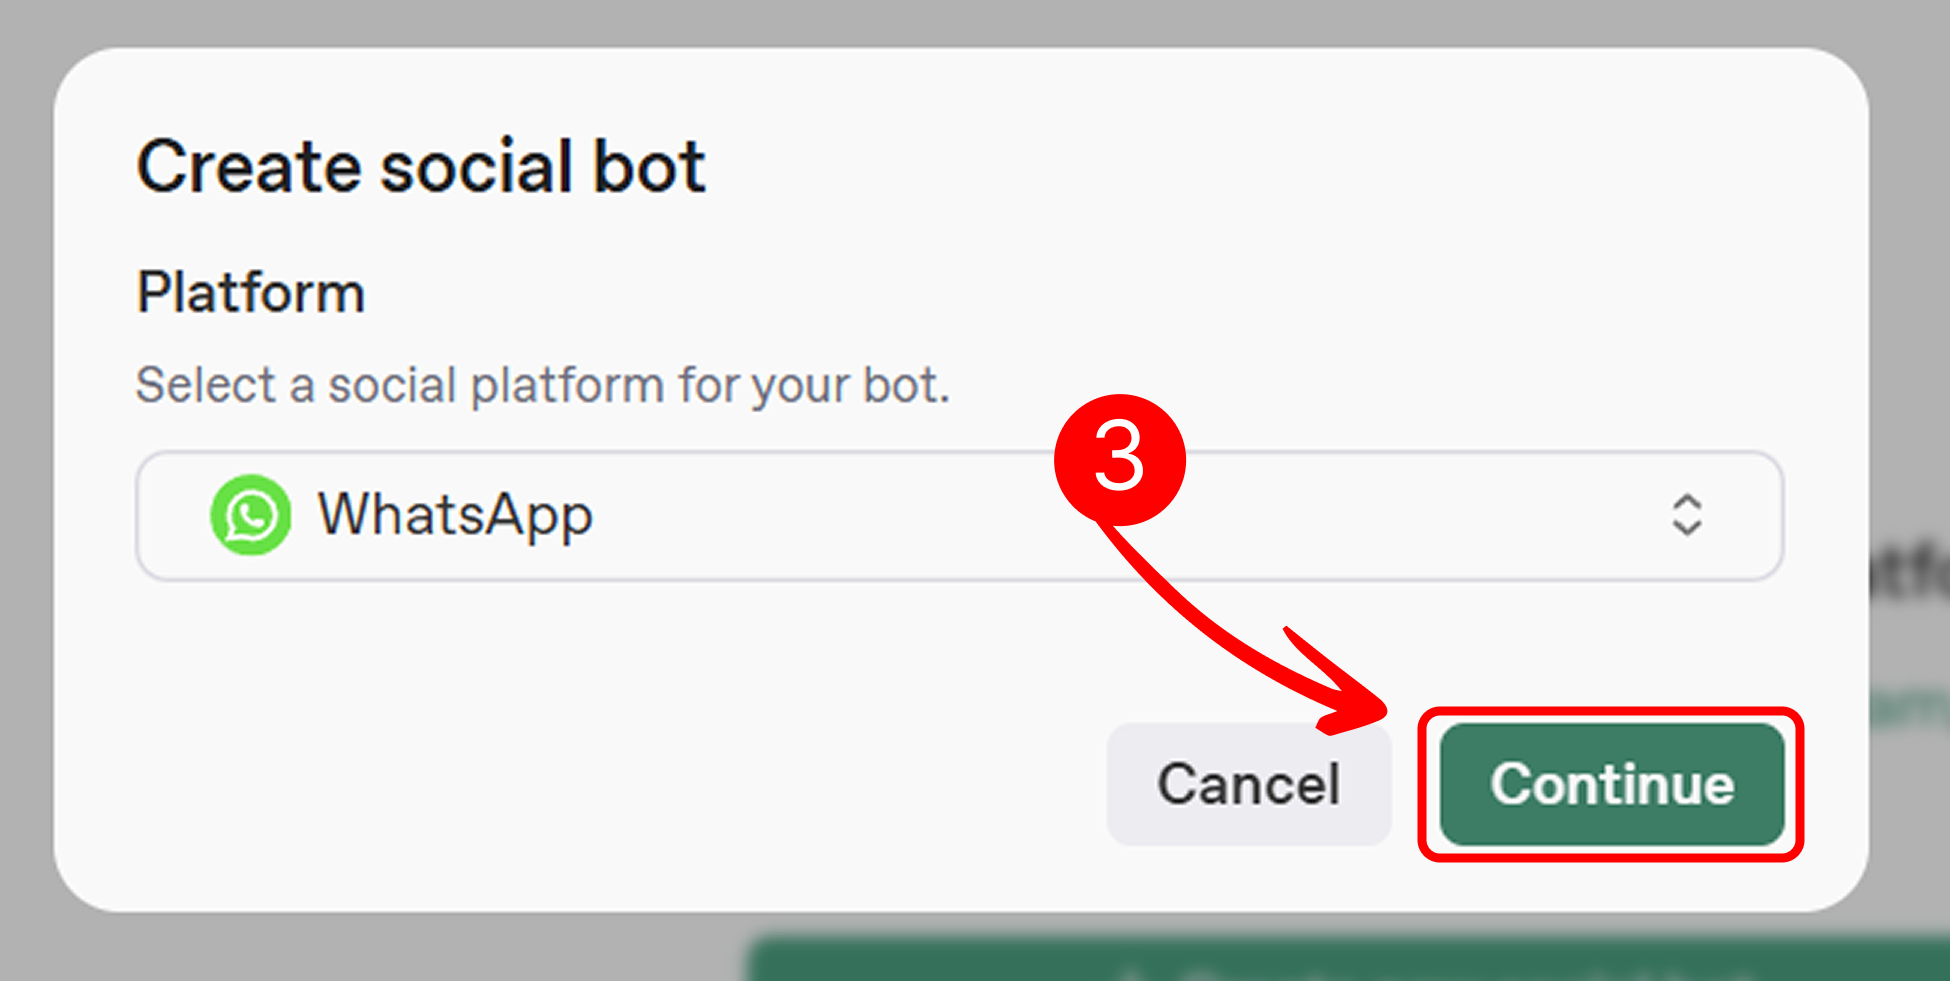
- Click Create New Social Bot, select WhatsApp, and click Continue.
-
Enter Bot Details: Fill in the required fields to configure your WhatsApp bot on the Mingleego platform:
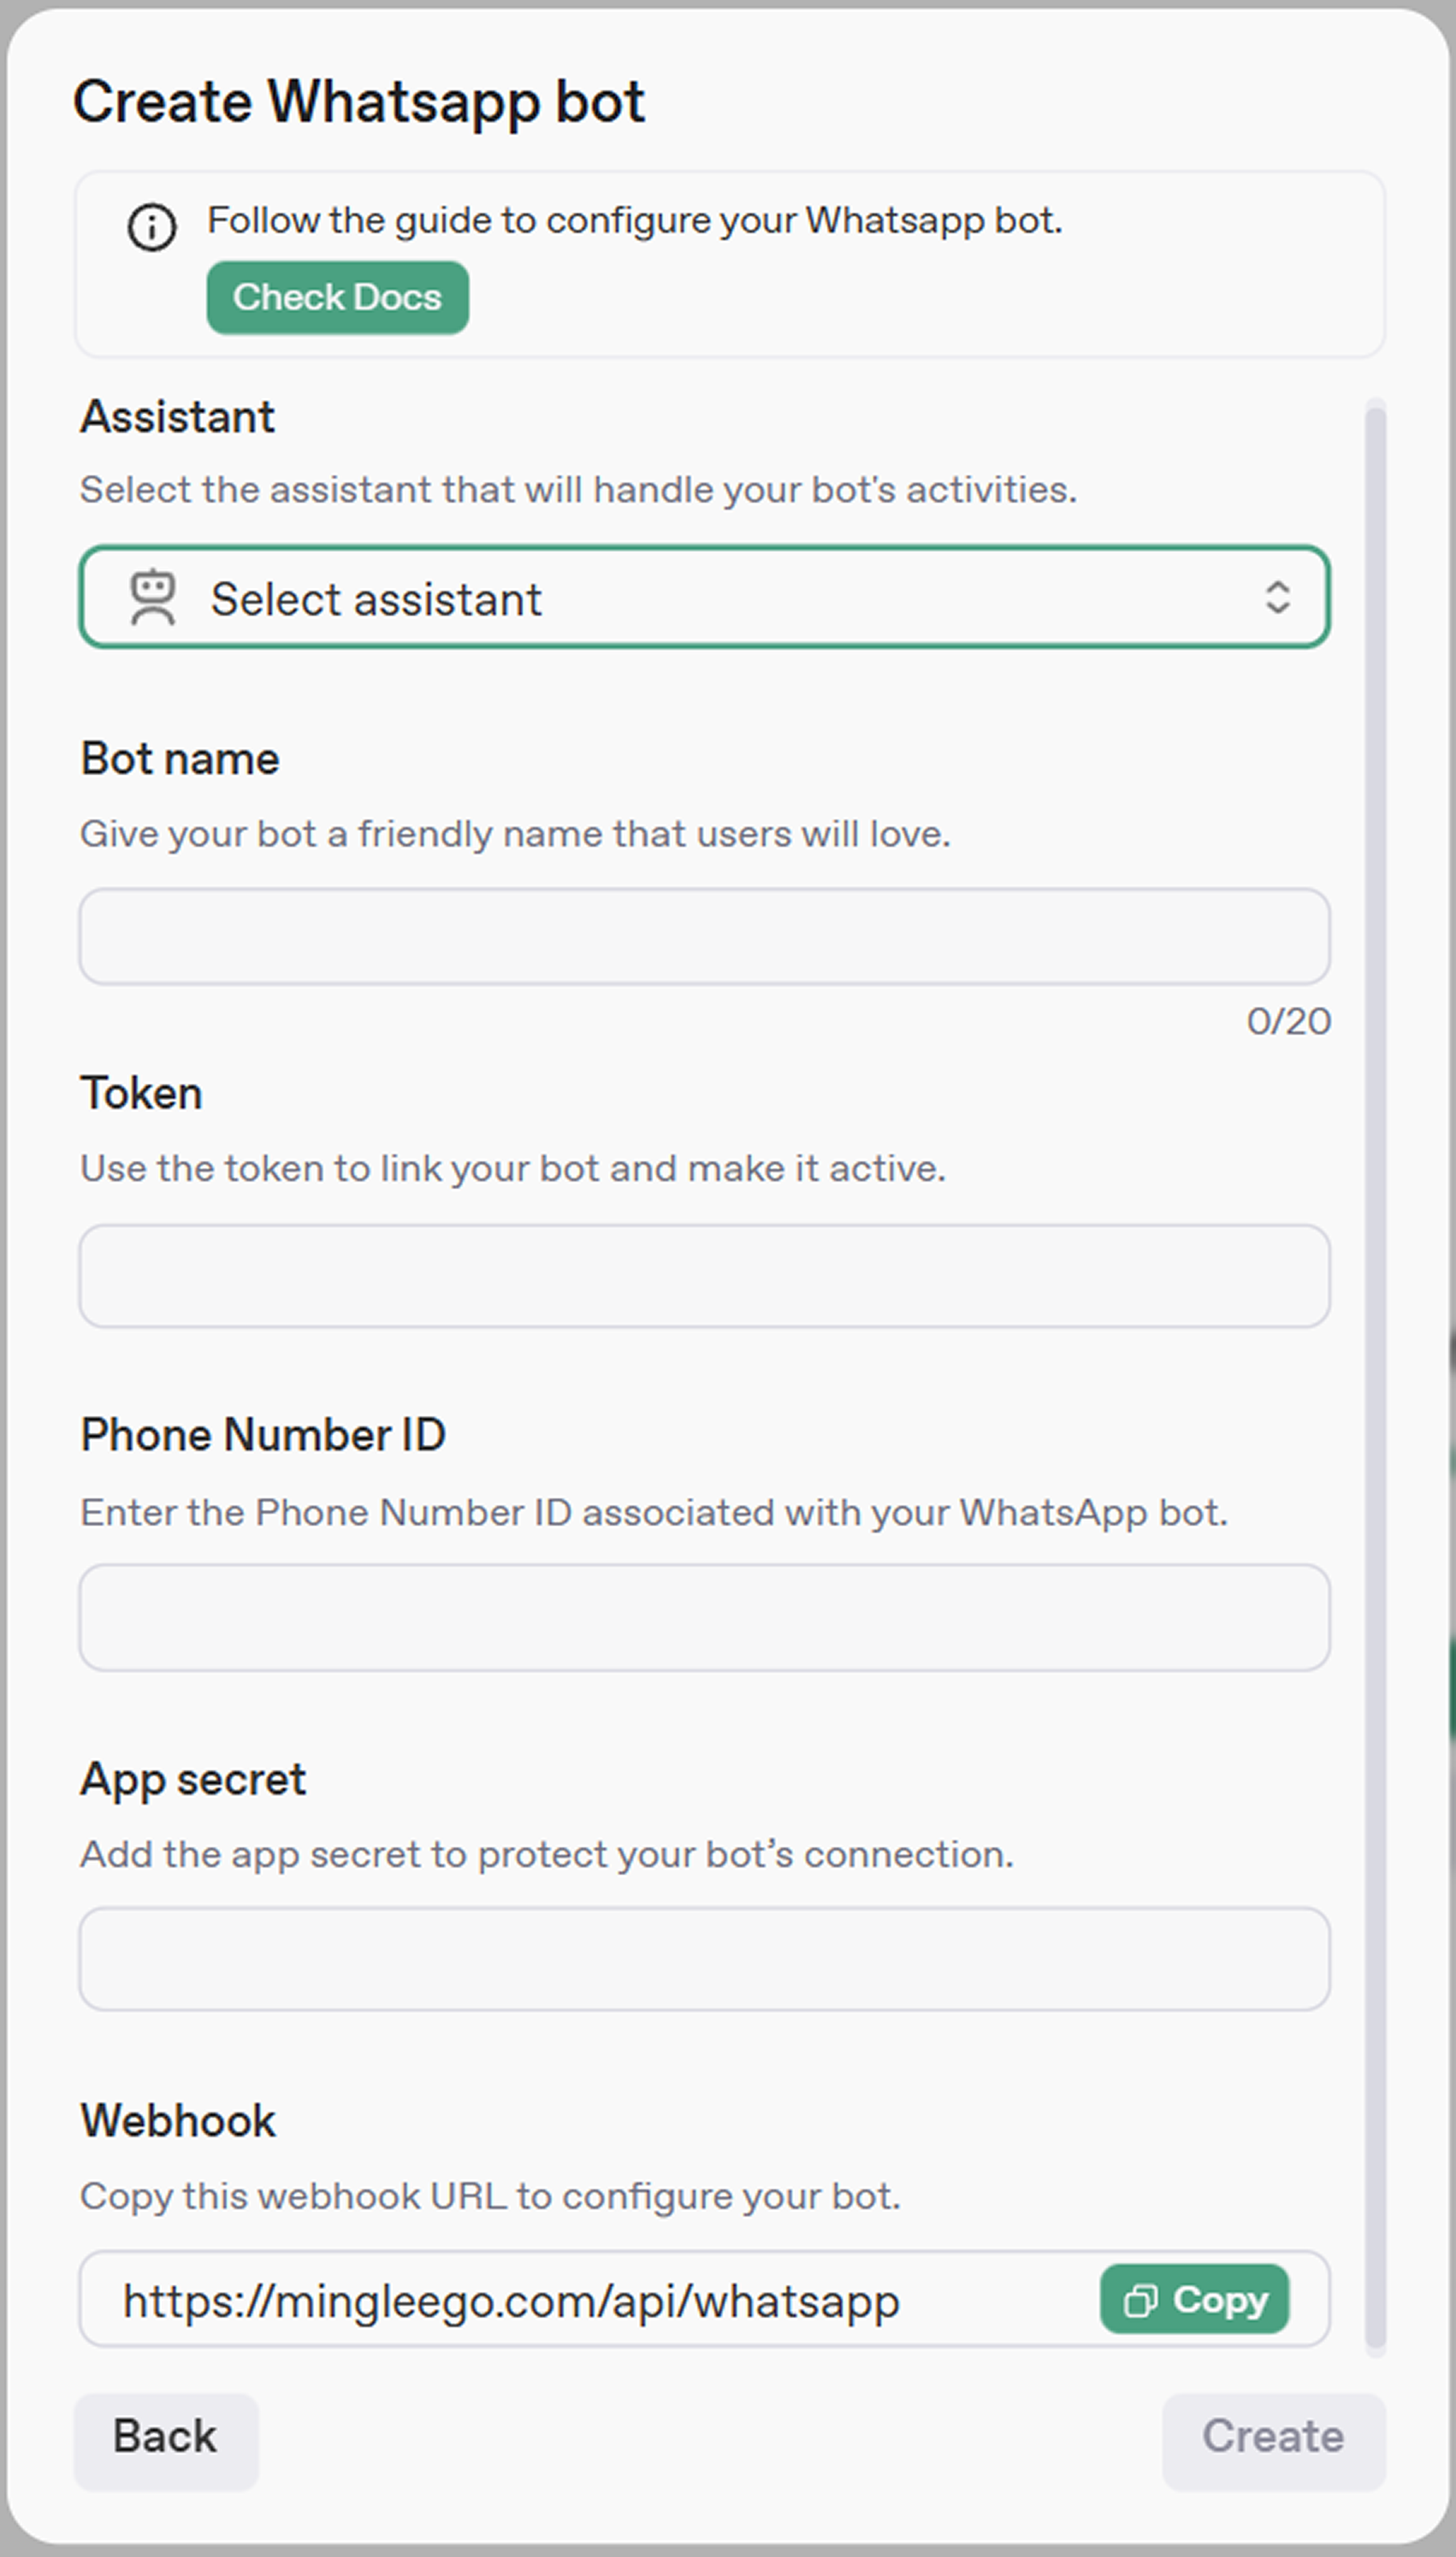
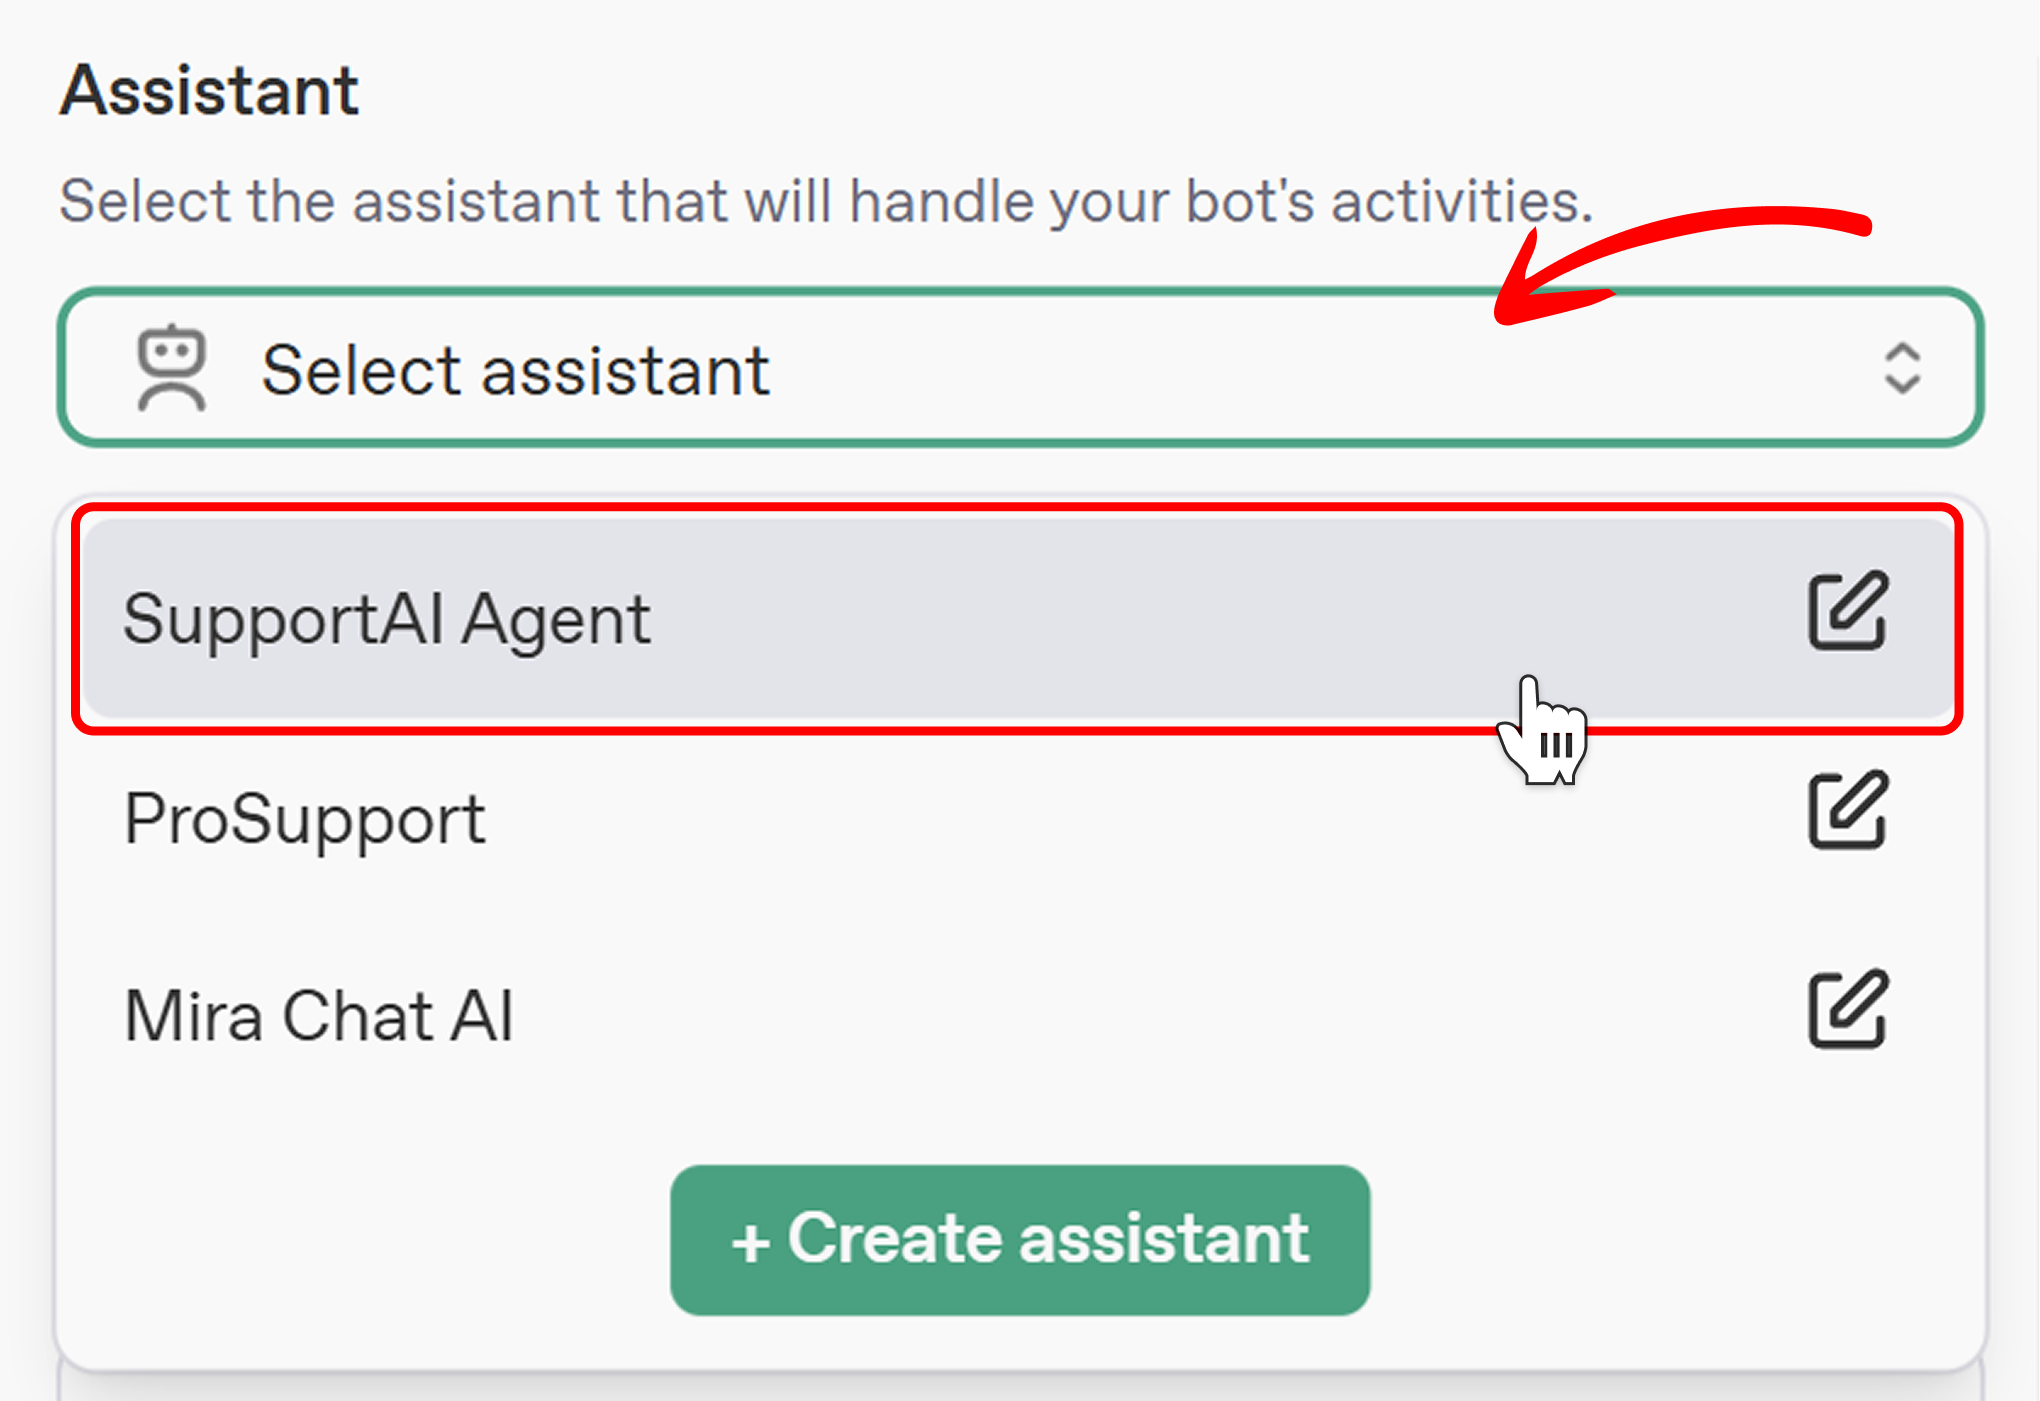
- Assistant: Select an AI assistant from the Select Assistant dropdown to power your bot's responses, aligning with its purpose. If none are listed, click Create Assistant. See the Creating an Assistant Guide for details.
- Bot Name: Enter a unique name to identify your bot on the Mingleego platform.
- Token: Paste the Access Token obtained from the Meta Developer App. For testing, you can use a temporary token, but for production, you'll need a permanent token generated via System Users, as described in the Generate Permanent Token section.
- Phone Number ID: Paste the Phone Number ID retrieved from Meta Developer App's WhatsApp API Setup, as outlined in the Obtain Phone Number ID section.
- Webhook: Copy the Webhook URL and use it in Meta Developer App's Webhook settings, as described in the Setting Up Webhook section.
-
Finalize Creation:
- Review all entered details in the form to ensure accuracy, then click Create to activate your WhatsApp bot on the Mingleego platform.
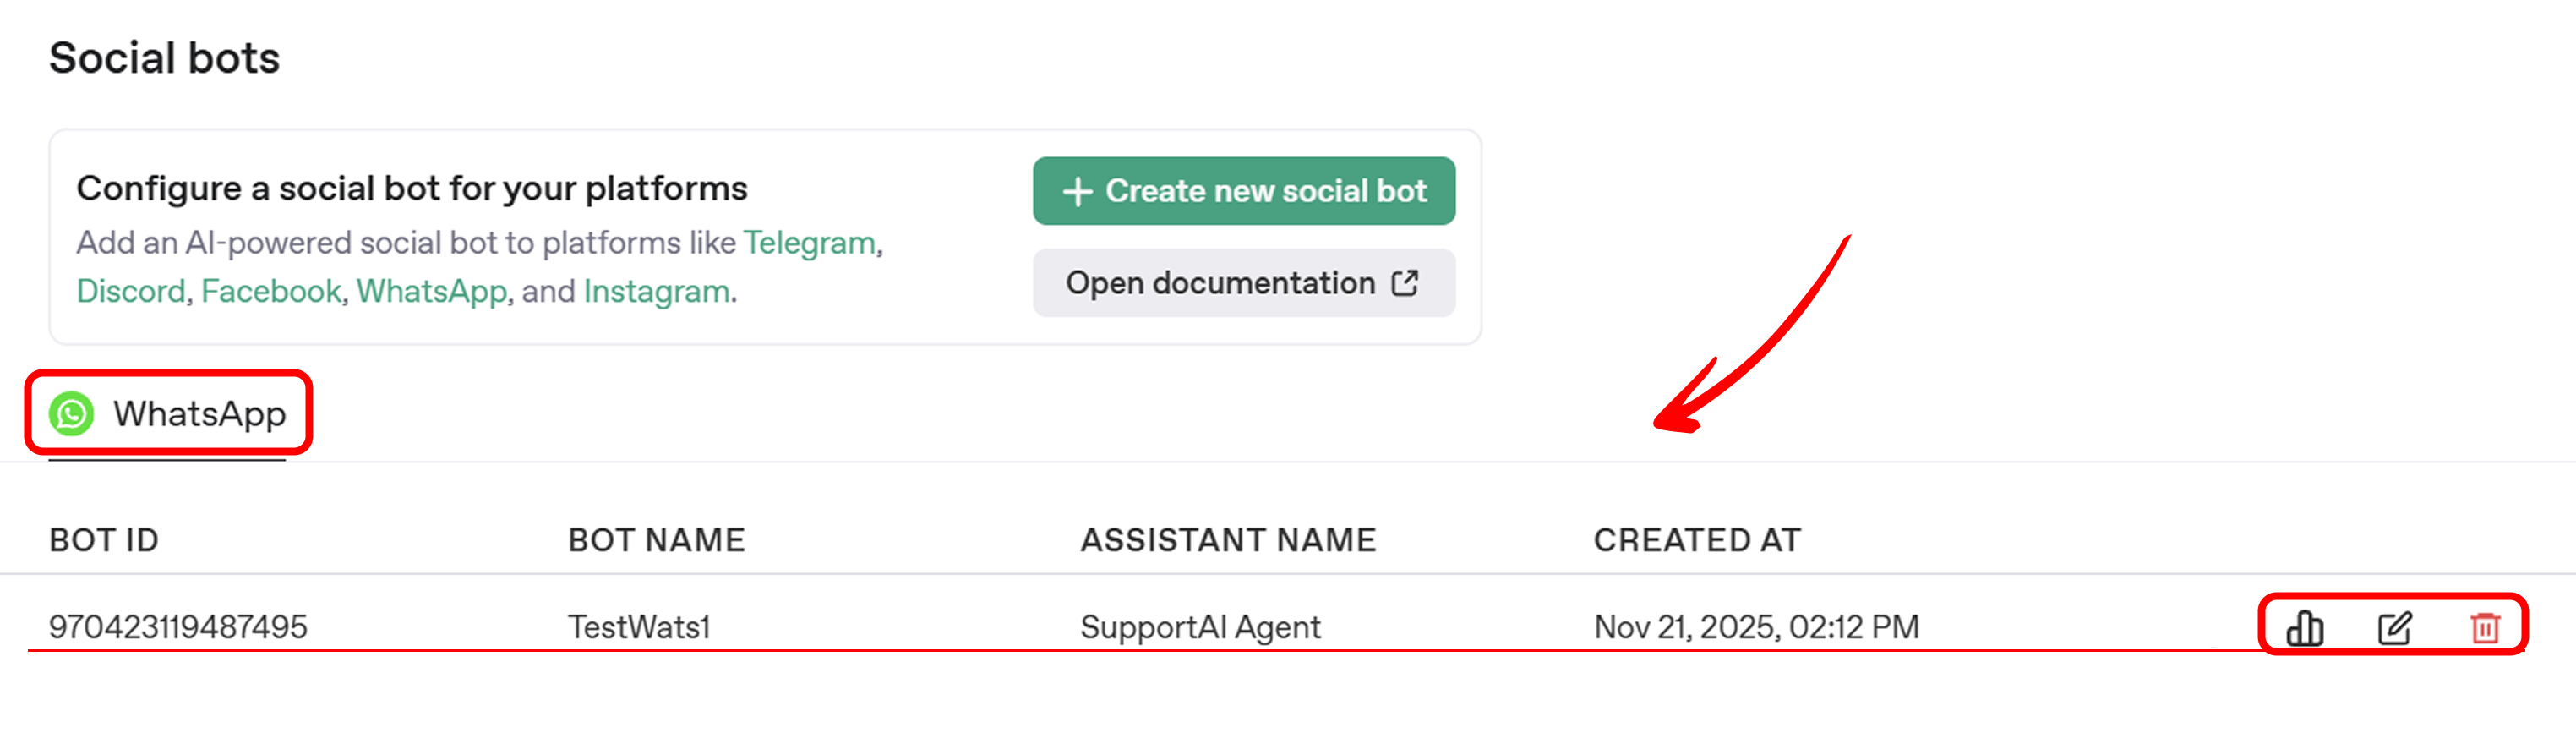
- After creation, your bot will appear in the WhatsApp tab under the Social Bots section, displayed in a table. From there, you can:
- View Statistics by bot users to monitor engagement and performance.
- Edit the bot by updating the same form fields to adjust its functionality.
- Delete the bot if it is no longer needed, removing it from the platform.
 Once the bot is activated, it is ready to handle WhatsApp messages based on the configured settings. You can test its functionality using the Mingleego Playground.
Testing Your WhatsApp Bot
Once the bot is activated, test its functionality to ensure it works as expected.
-
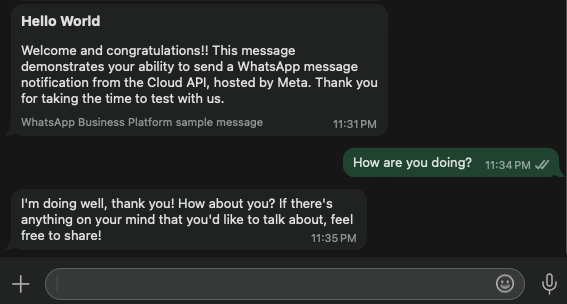
Send Test Messages:
- Send a test message to your WhatsApp bot (e.g., "Hello World").
- Verify that the bot responds correctly based on the configured assistant behavior.
-
Monitor and Adjust:
- Use the Mingleego Playground to test bot responses with various user inputs.
- If adjustments are needed, edit the bot settings via the Social Bots section on Mingleego.
Best Practices
To ensure optimal performance of your WhatsApp bot, follow these recommendations:
- Test Thoroughly: Use the Mingleego Playground to test bot responses with various user queries.
- Secure Tokens: Store Phone Number ID and Access Token in a secure location to prevent unauthorized access.
- Use Permanent Tokens: Always use permanent tokens (set to "Never" expiration) for production bots to avoid service interruptions.
- Monitor Webhook: Regularly verify that the webhook is receiving WhatsApp messages correctly.
- Comply with Meta Policies: Adhere to the Meta Platform Terms and WhatsApp Business Policy to ensure compliance and avoid app suspension.
- Update Tokens: If you need to regenerate a token, follow the same process in Business Settings to create a new permanent token.
Conclusion
You have successfully configured and integrated a WhatsApp bot with the Mingleego platform using the Meta WhatsApp Cloud API. By following this guide, your bot is now equipped to automate messaging, respond to customer inquiries, and enhance engagement on WhatsApp. To ensure long-term performance, regularly monitor your bot's activity, update its settings as needed, and adhere to Meta's policies. For further customization or troubleshooting, refer to the Mingleego Playground or explore additional resources in the Social Bots Guides.